

Introduction
If you're looking to upgrade your audio experience in your 2007-2013 Toyota Tundra, installing an aftermarket head unit can significantly enhance your driving experience. This guide will walk you through the installation process step-by-step, including wiring diagrams and helpful video resources.
Tools Required
No specific tools are mentioned in the installation guide, but general tools for dashboard removal and wiring connections are typically needed.
Pre-Installation Notes
Before you start, ensure you have the following:
- Your order number.
- A picture of your original car dashboard.
- The manufacturing year of your vehicle.
It's also helpful to prepare clear pictures and videos in case you need to troubleshoot with tech support. For software-related issues, access the settings and capture the system info/version.
Removal Steps
To remove the factory dashboard, access the following video guide:
Installation Steps
Once the factory dashboard is removed, you can proceed with the installation of the head unit. Depending on whether your Tundra has a JBL AMP or not, use the appropriate video guide:
Wiring and Connections
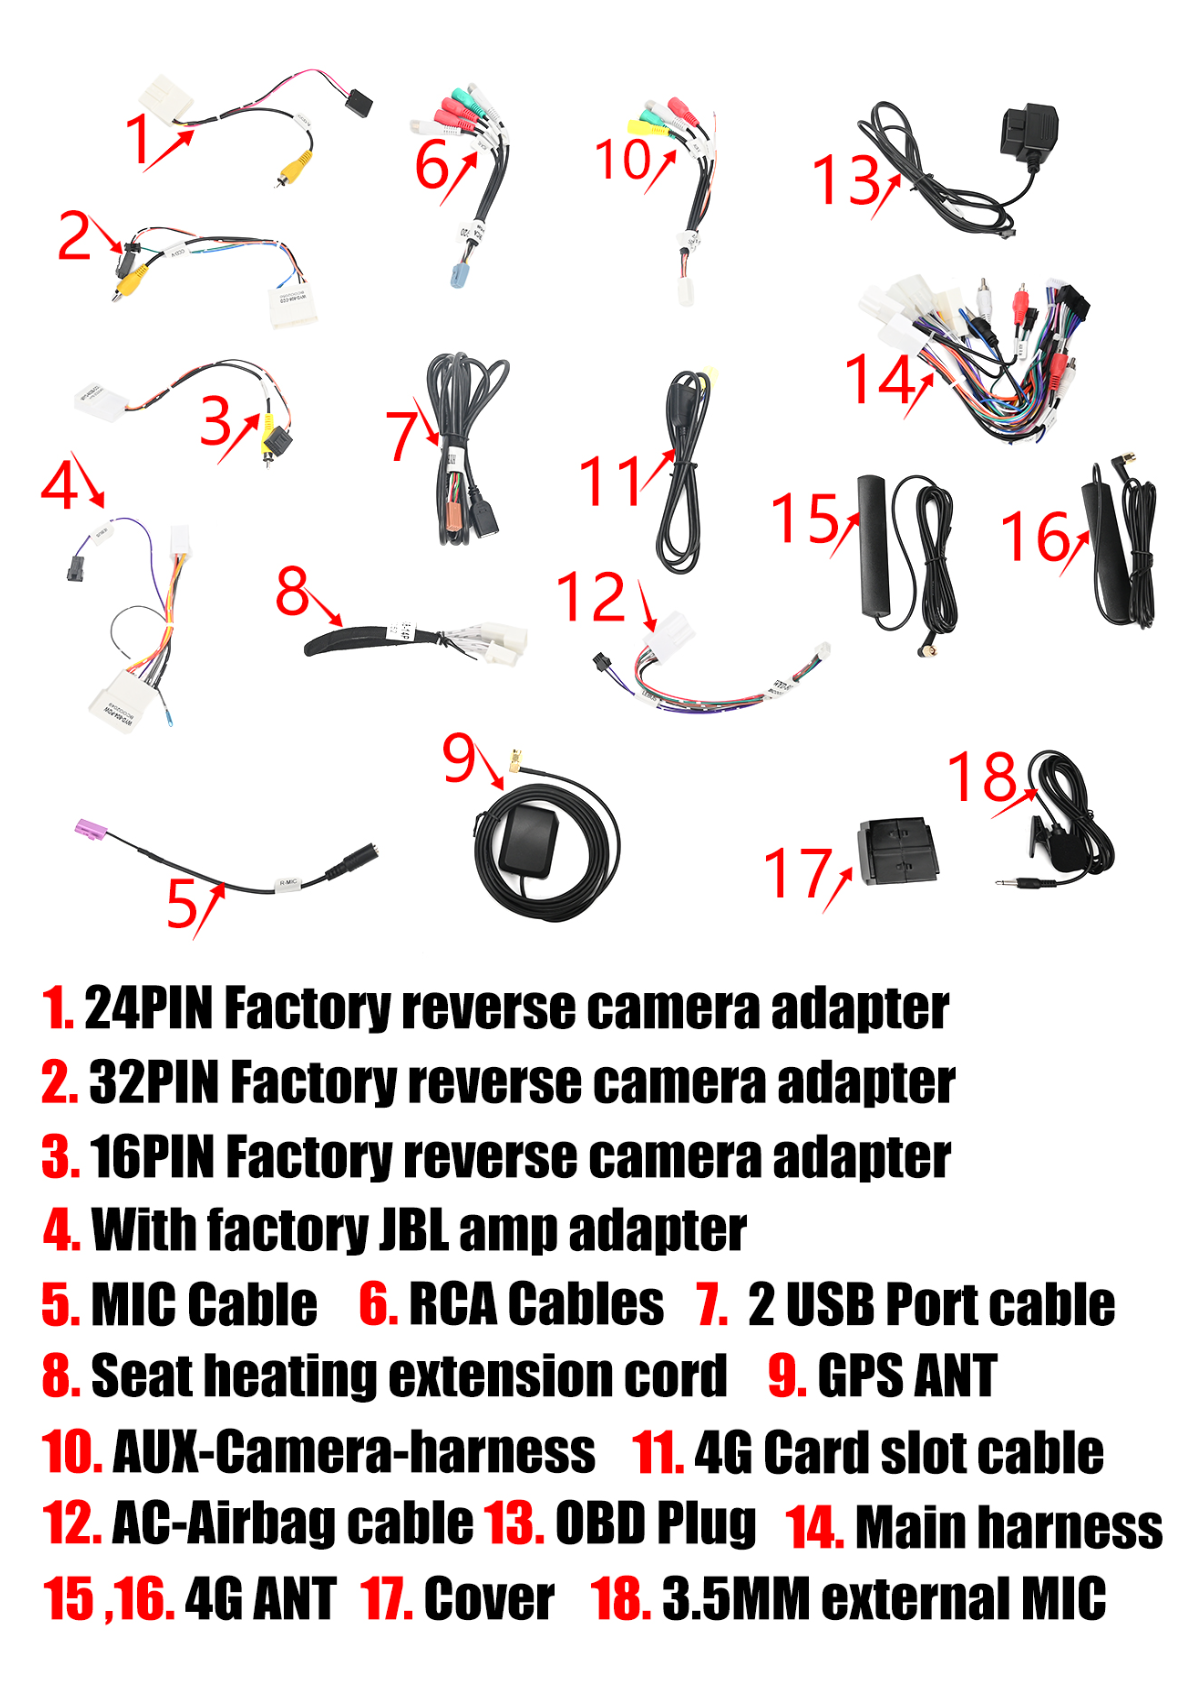
Here are the main components and connections you'll need to make:
Main Components
- 24PIN, 32PIN, 16PIN Factory reverse camera adapters
- MIC Cable
- RCA Cables
- USB Port cable
- GPS ANT
- 3.5MM external MIC
Head Unit Connections
- RCA Harness socket
- AUX-CAMERA Harness socket
- 4G Card slot cable socket
- USB plug socket
- External MIC socket
- 4G ANT socket
- GPS ANT socket
- 20 PIN-CAN socket
- 8 PIN AUX-AUDIO CAN socket
Main Harness Details
- Power cable plug
- AMP control
- AUX-R, AUX-L
- 2PIN OBD PLUG
- 20 pin CANBUS plug
JBL-specific Connections
- Factory reverse camera signal input
- Factory reverse camera plug
- IEBUS plug for cars with JBL amp
- Female JBL AMP power cable plug
Post-Installation
After completing the installation, reassemble any removed trim pieces and ensure all connections are secure. Power the unit to verify functionality.
Tips & Warnings
- Use the correct factory reverse camera plug based on your car's configuration.
- Ensure all connections are tight and secure to prevent connectivity issues.
- If you encounter any issues during installation, contact support at support@aucarauto.com or via WhatsApp/Phone: +86 158 1187 6790.
Make sure to handle all electrical components carefully and disconnect the battery while working to avoid short circuits.
Conclusion
Upgrading your Toyota Tundra with a new head unit can greatly enhance your driving experience. Follow this guide carefully for a smooth installation process, and enjoy your upgraded audio system!
Related Products
For more options on head units, check out our G-Series Android Head Units.
Share:
How to Install a Head Unit in Your Toyota Tacoma (2005-2015): Complete Guide with Wiring Diagrams
CarPlay Not Working After Head Unit Upgrade? Complete Troubleshooting Guide