
Introduction
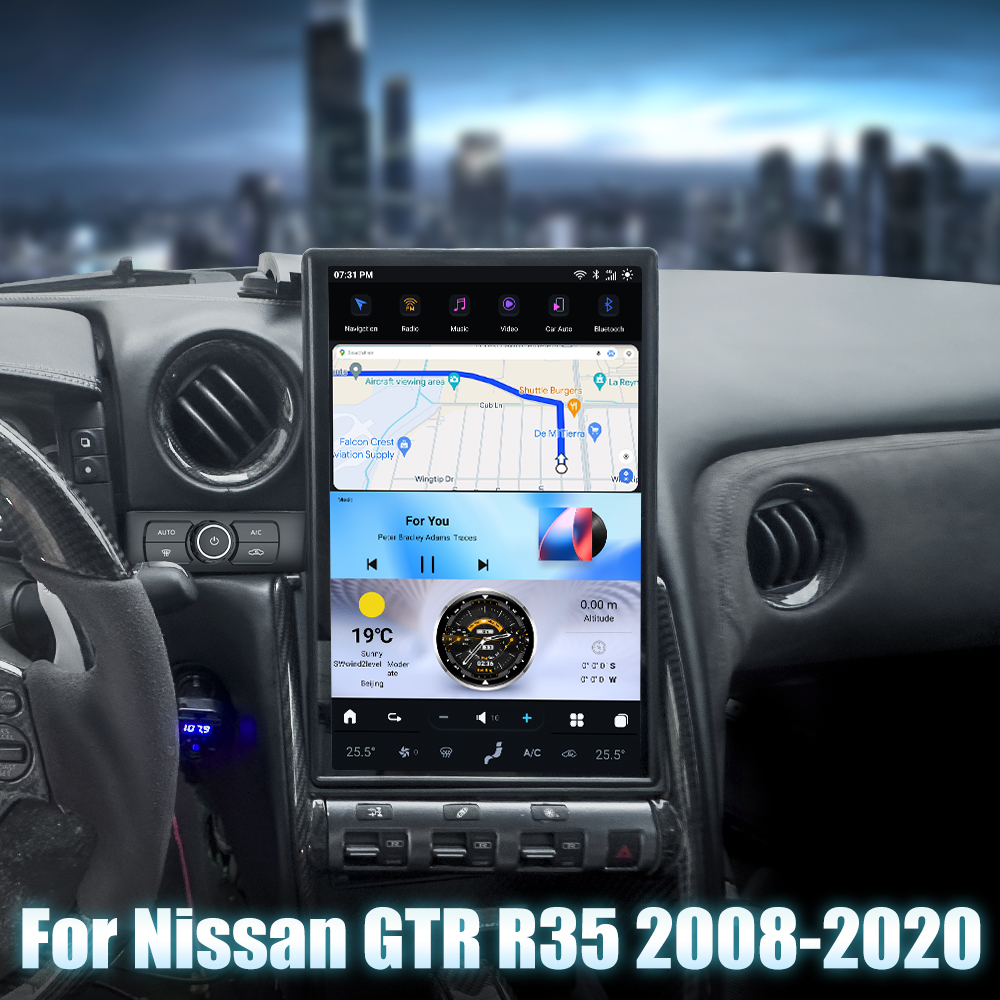
Upgrading the head unit in your Nissan GTR (2008-2016) can significantly enhance your driving experience. This guide will walk you through the installation process of the SquareWheels G-Series Head Unit, providing you with the necessary steps and wiring diagrams to ensure a smooth installation.
Tools Required
- Flat plastic pry tool
- Philips head screwdriver
- Small flat-head screwdriver
Pre-Installation Notes
Before you begin, ensure your vehicle is parked safely and the engine is turned off. Handle all components, especially the OEM screen, with care as they are fragile.
Removal Steps
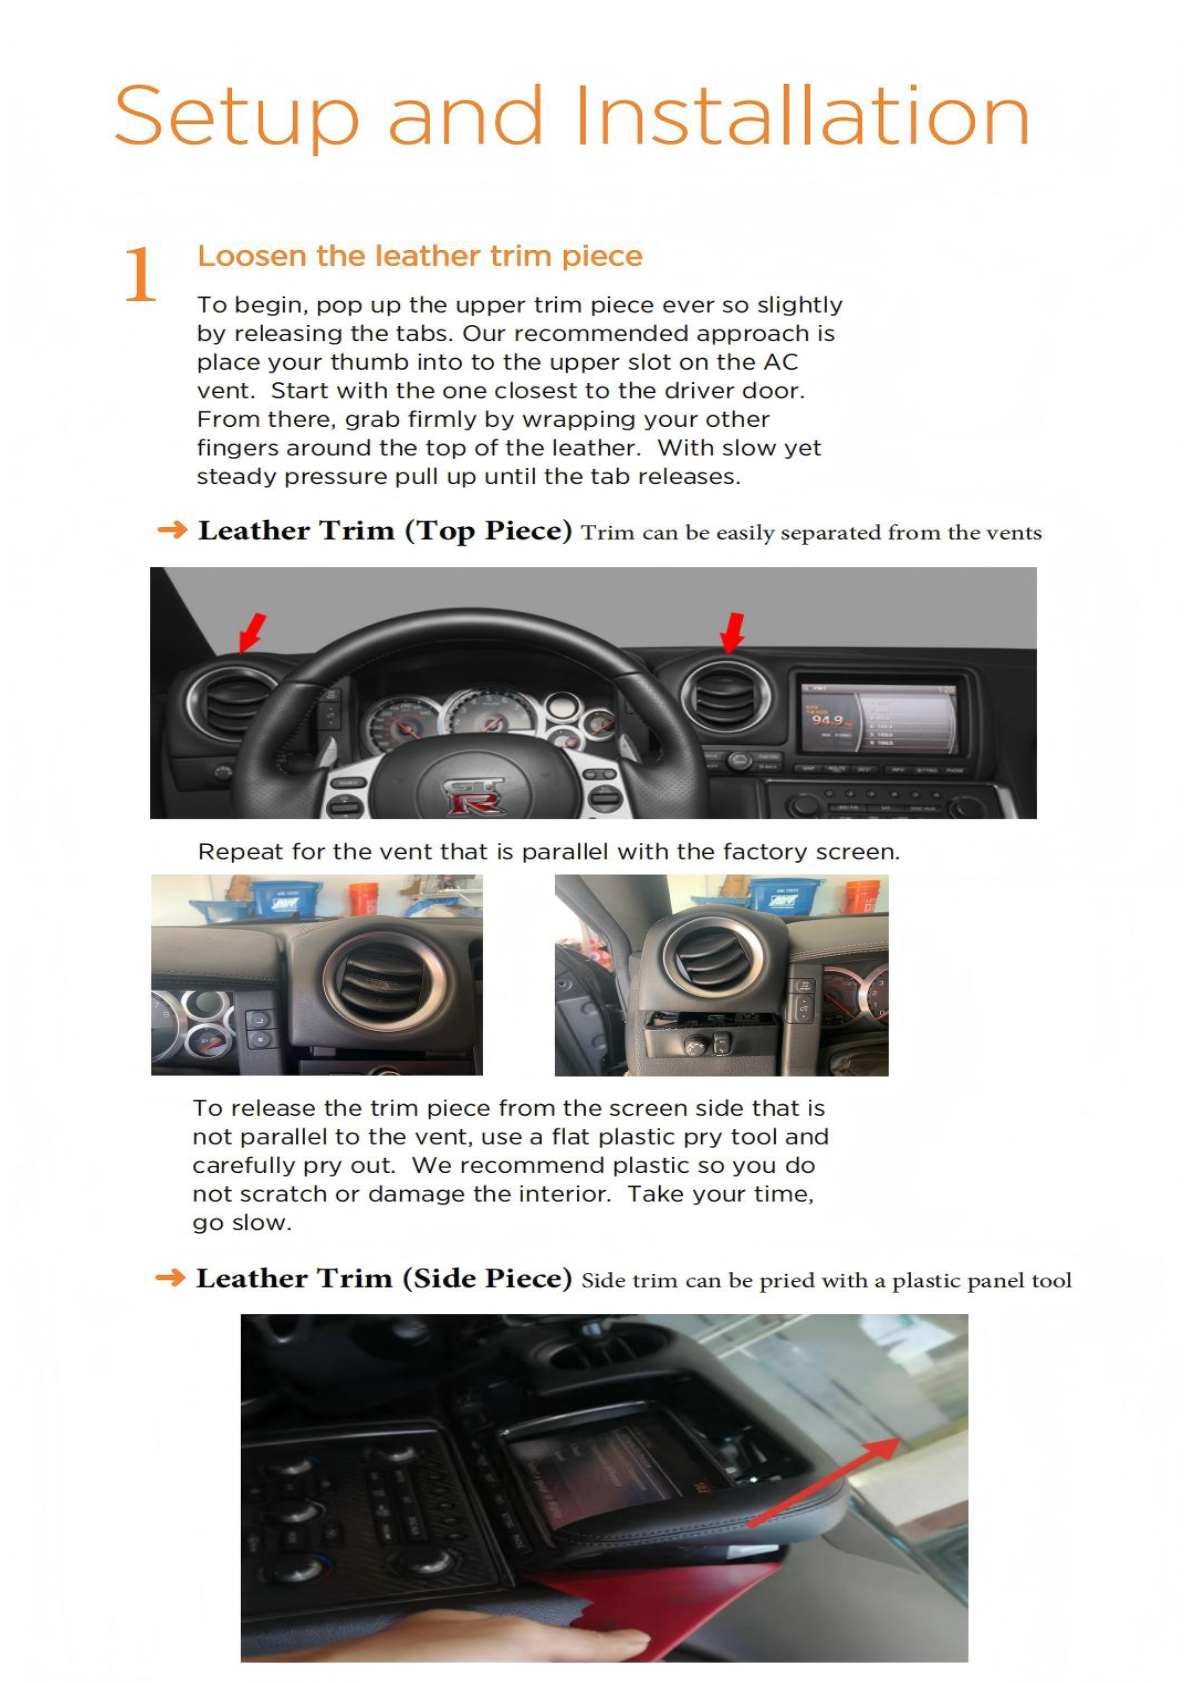
1. Loosen Leather Trim Pieces
Start by popping up the trim pieces:
- Top Piece: Insert a thumb into the upper slot on the AC vent, starting near the driver door, and pull up steadily to release the tabs.
- Side Piece: Use a plastic tool to carefully pry the trim piece from the screen side.
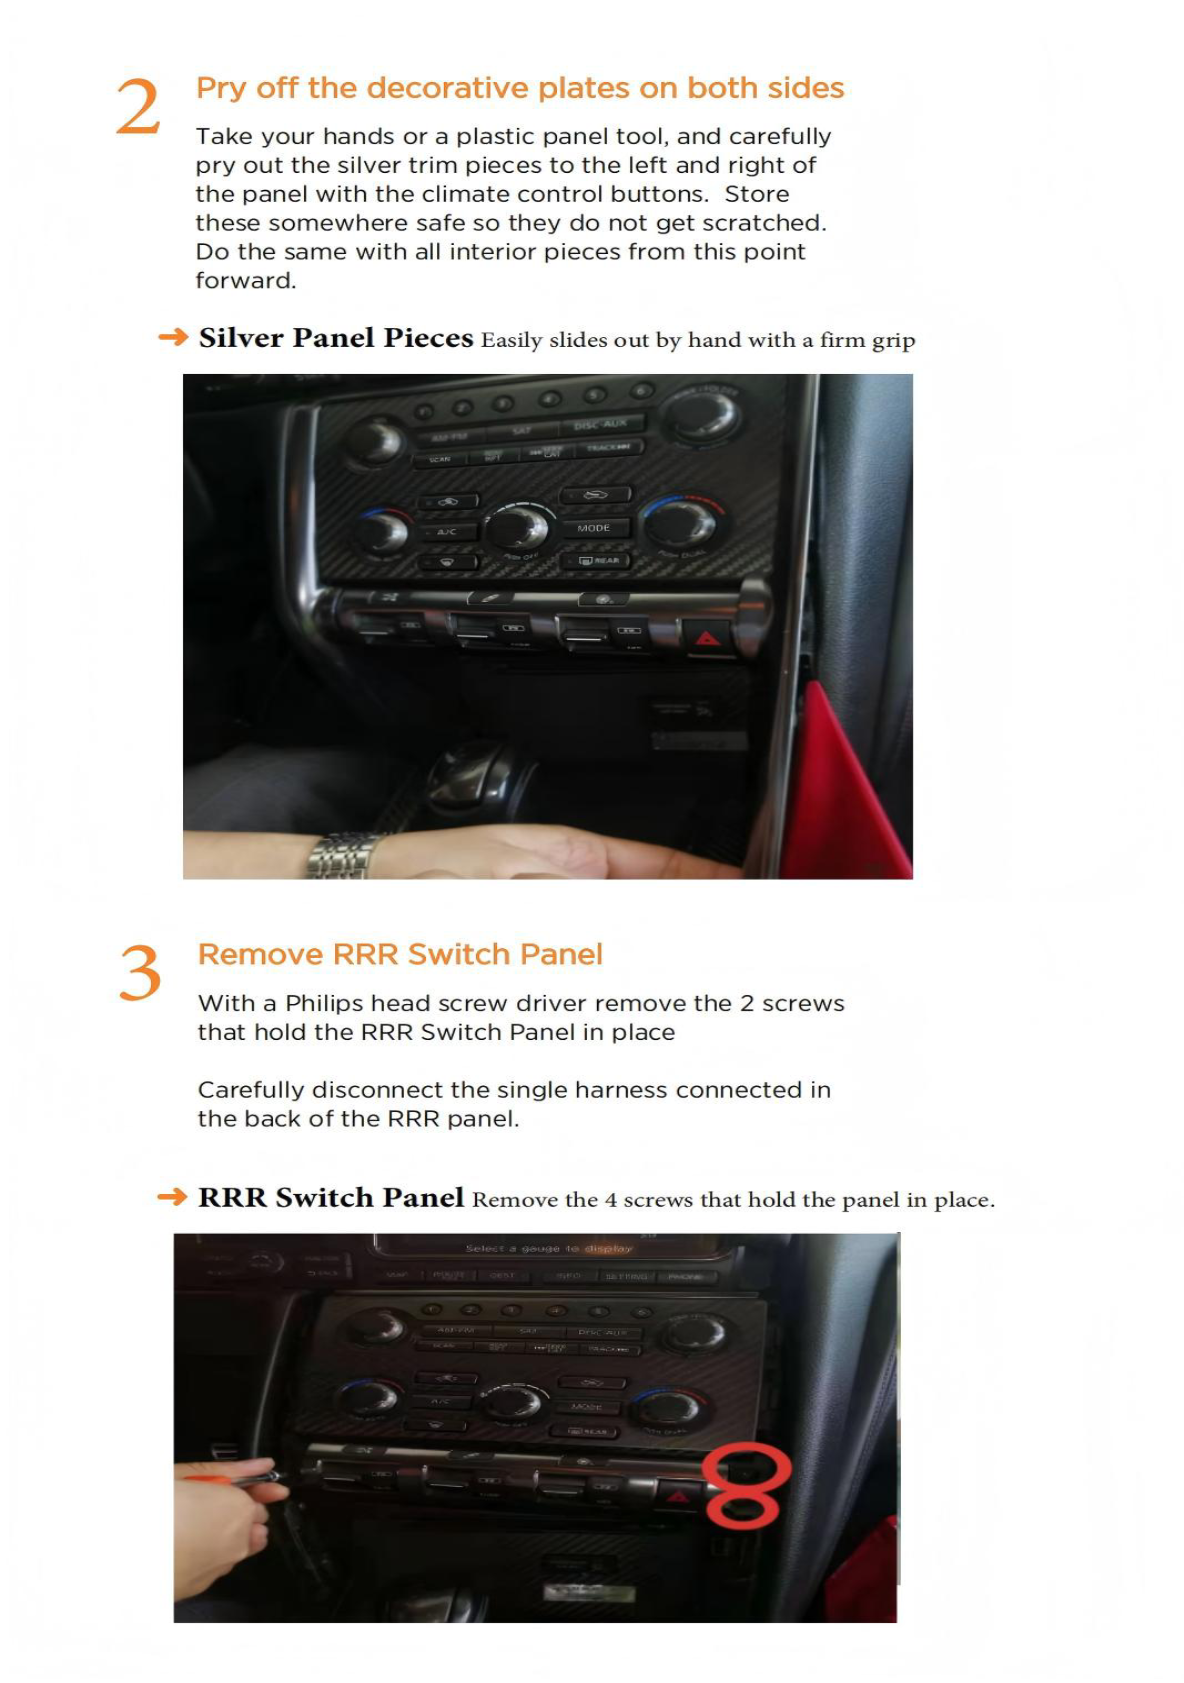
2. Pry Off Decorative Plates
Remove the silver trim pieces next to the climate control buttons using a plastic panel tool.
3. Remove RRR Switch Panel
Unscrew the two screws holding the panel using a Philips screwdriver and disconnect the single harness behind the panel.
4. Remove Climate Control Button Panel
Unscrew two screws to remove the Climate Control Panel. Pry the panel out and disconnect the three harness connections at the back.
5. Remove Factory Screen
Use a Philips screwdriver to remove the four screws securing the screen. Slide out the screen and disconnect any attached harnesses.
6. Remove Center Console Trim Pieces
Remove decorative panels on both sides of the console using your hands or a plastic tool.
7. Remove Gear Shift Knob
Insert a flat-head screwdriver into the lower opening, press down, and release the knob. Be cautious of the small metal clip; do not lose it.
8. Remove Start Button and Panel
Unscrew two Philips screws and disconnect the two harnesses.
Installation Steps
Installation steps are not detailed in the provided images. Refer to the product manual for specific installation instructions.
Wiring/Connections
Disconnect harnesses as described during removal. Below is the wiring diagram for your reference:
Post-Installation
Post-installation generally involves reassembly and testing of the new head unit. Ensure all connections are secure and functional before finalizing your installation.
Tips & Warnings
- Be gentle with all wiring and components to avoid damage.
- Handle the OEM screen with extra care.
- Ensure the metal clip in the gear shift knob is not misplaced.
- Be mindful of minimal wire lengths when disconnecting harnesses, as they are delicate.
Conclusion
Installing a new head unit in your Nissan GTR can be a rewarding project that enhances your driving experience. By following this guide, you can ensure a successful installation of the SquareWheels G-Series Head Unit.
For more information on our products, visit our Nissan GTR Head Unit page.
Share:
How to Install a Head Unit in Your Nissan 370Z (2009-2021): Complete Guide with Wiring Diagrams
How to Install a Head Unit in Your Nissan Titan (2016-2019): Complete Guide with Wiring Diagrams