

Introduction
Upgrading your Bentley Continental GT Flying Spur with a new G-Series head unit can enhance your driving experience with modern features and improved functionality. This guide will walk you through the installation process for models from 2003 to 2019.
Tools Required
While specific tools are not explicitly listed, standard tools for car stereo installation are typically needed, including:
- Screwdrivers
- Trim removal tools
- Pliers
Pre-Installation Notes
Before starting your installation, ensure the car's battery is disconnected to avoid any electrical issues.
Removal Steps
To remove the factory unit, follow these steps:
- Refer to the image of the 2005-2012 OEM Radio to identify the factory reverse camera plug, radio ANT plug, and factory power cable plug.
- Carefully disconnect these plugs when removing the existing unit.
Installation Steps
Once the factory unit is removed, proceed with the installation:
- Mounting the Head Unit: Position the new G-Series head unit in the factory unit’s place, ensuring it aligns with the existing mounting points.
Wiring/Connections
Now it’s time to make the necessary connections:
- Connect the Head Unit Power Socket.
- Attach the AUX-CAMERA harness socket and RCA harness socket.
- Insert the GPS ANT Socket and Radio ANT Socket as labeled.
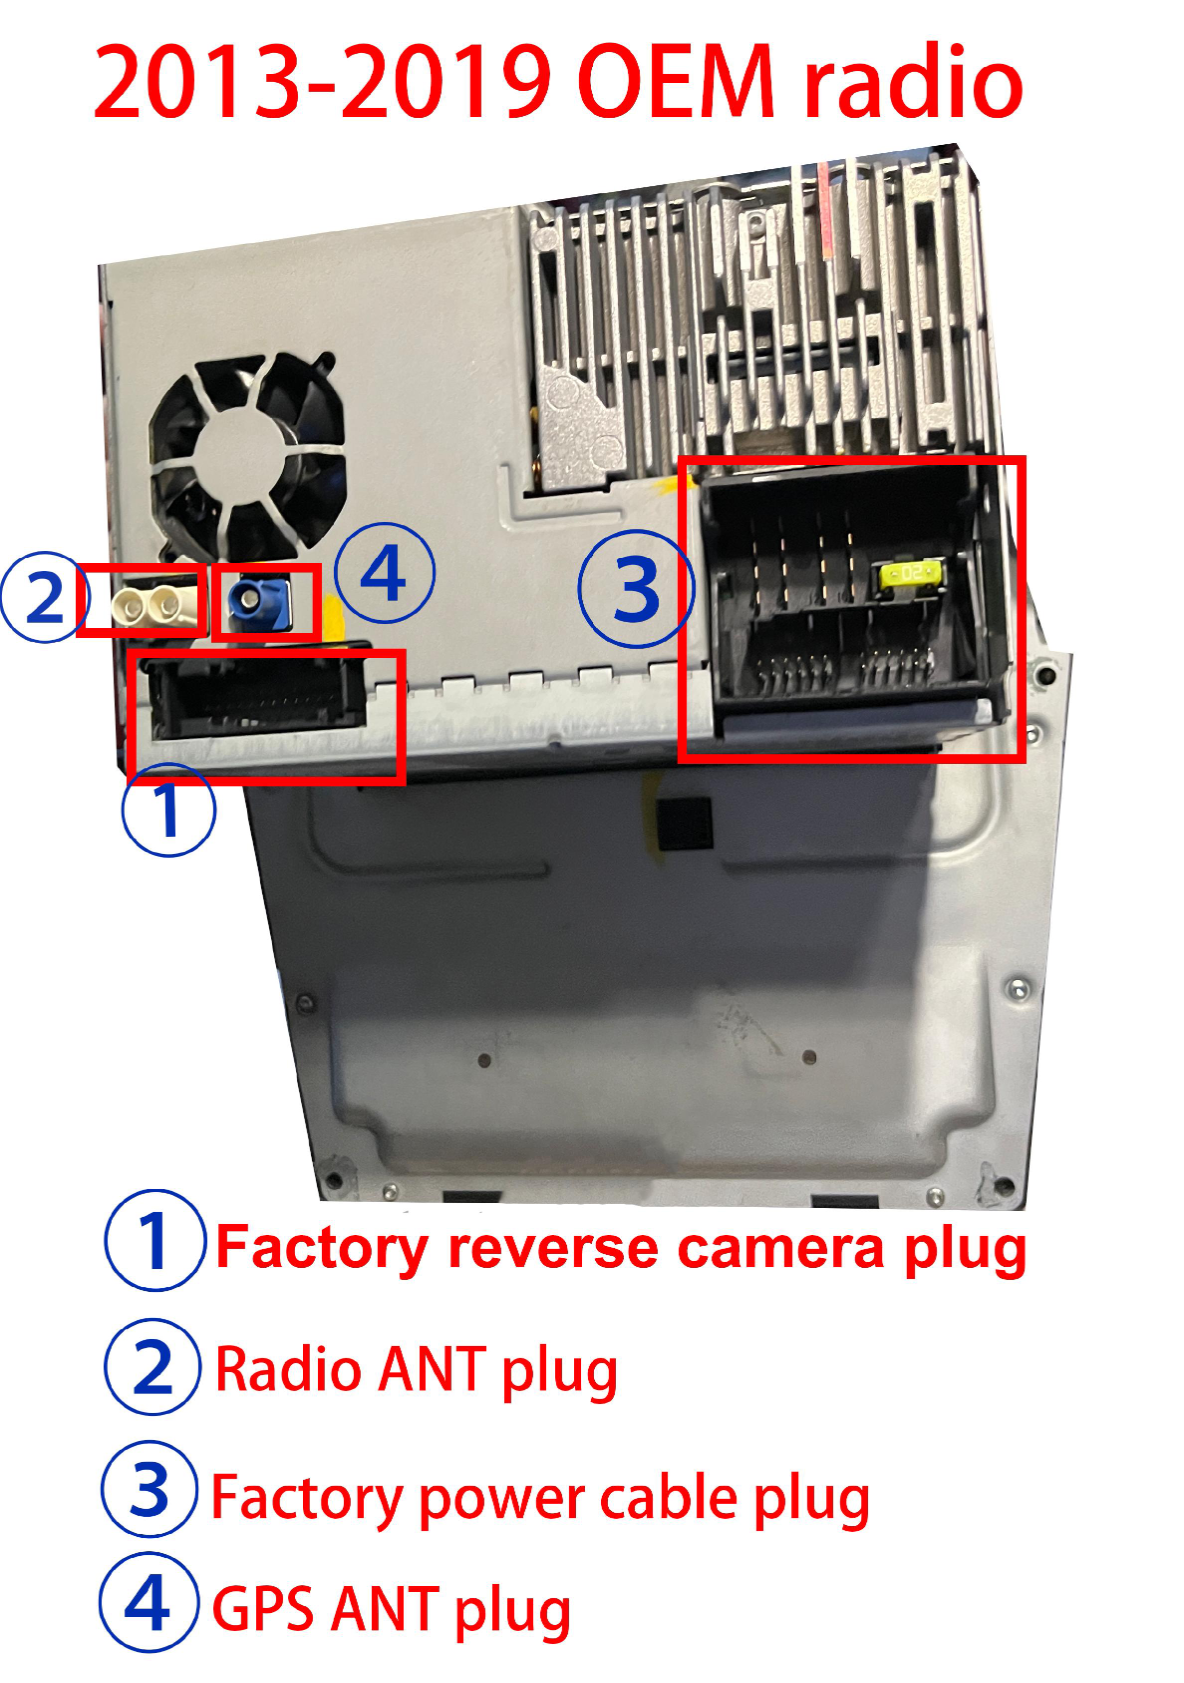
- For models between 2013-2019, attach the 8 pin AUX-AUDIO CAN socket and 20 pin-CAN-reverse camera socket.
Utilize the correct main harness based on your model year (2013-2019 or 2005-2012) and connect the additional harnesses as needed:
- Connect the External MIC to the provided 3.5mm MIC port.
- Attach the 4G ANT, SIM card cable, and relevant harnesses for features like online music and videos.
Post-Installation
After installation, it’s crucial to test the unit:
- Power on the unit and verify all features function, including GPS, radio, and any connected cameras.
- Adjust settings as necessary to match your preferences.
Reassembly
Ensure all connections are secure and reinstall any panels or trim that were removed during the process.
Tips & Warnings
- Always disconnect the vehicle’s battery before starting installation to prevent short circuits.
- Handle connectors with care; do not force them to avoid damage.
- Double-check the compatibility of cables and connectors to prevent misconnections.
Conclusion
By following this structured process, you can successfully install the G-Series head unit in your Bentley Continental GT Flying Spur. Enjoy your upgraded audio experience!
Installation Diagrams
Photo showing the head unit with labeled sockets and connections for installation.
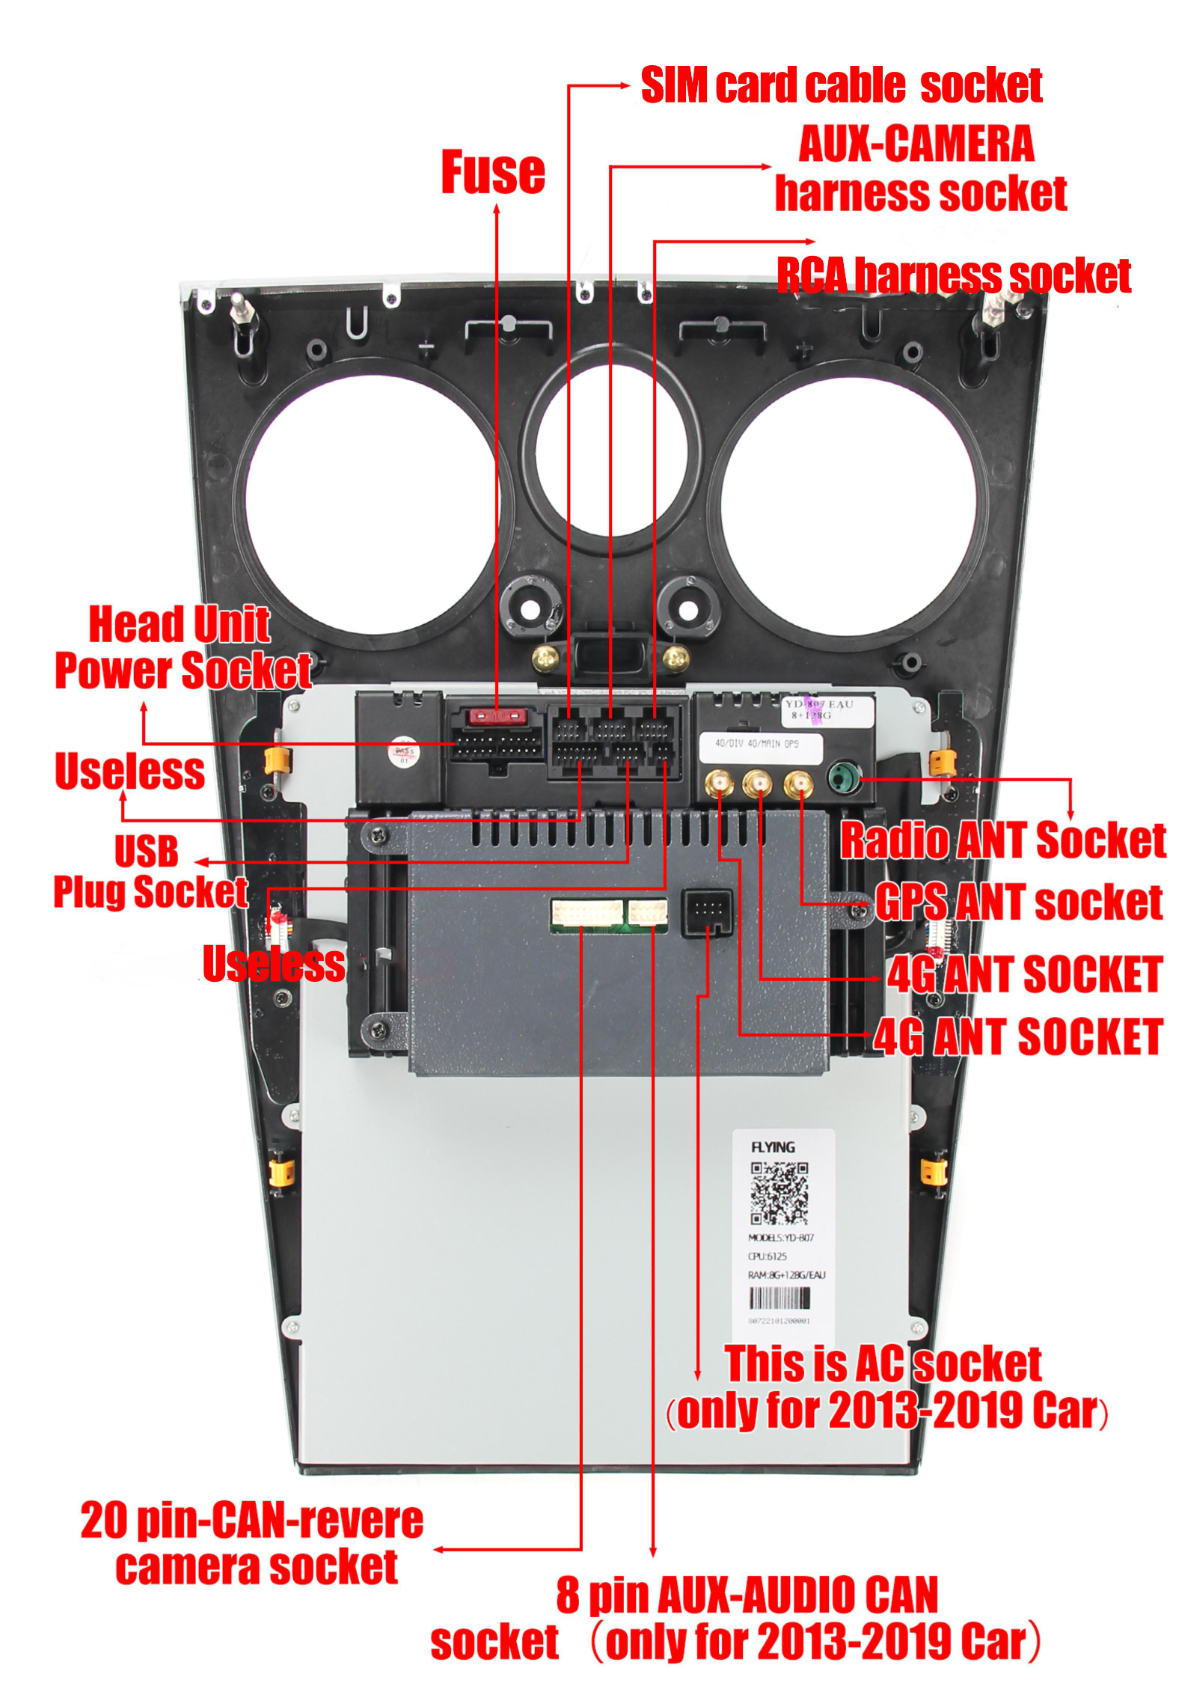
Photo showing various components and accessories related to the installation of an aftermarket head unit.
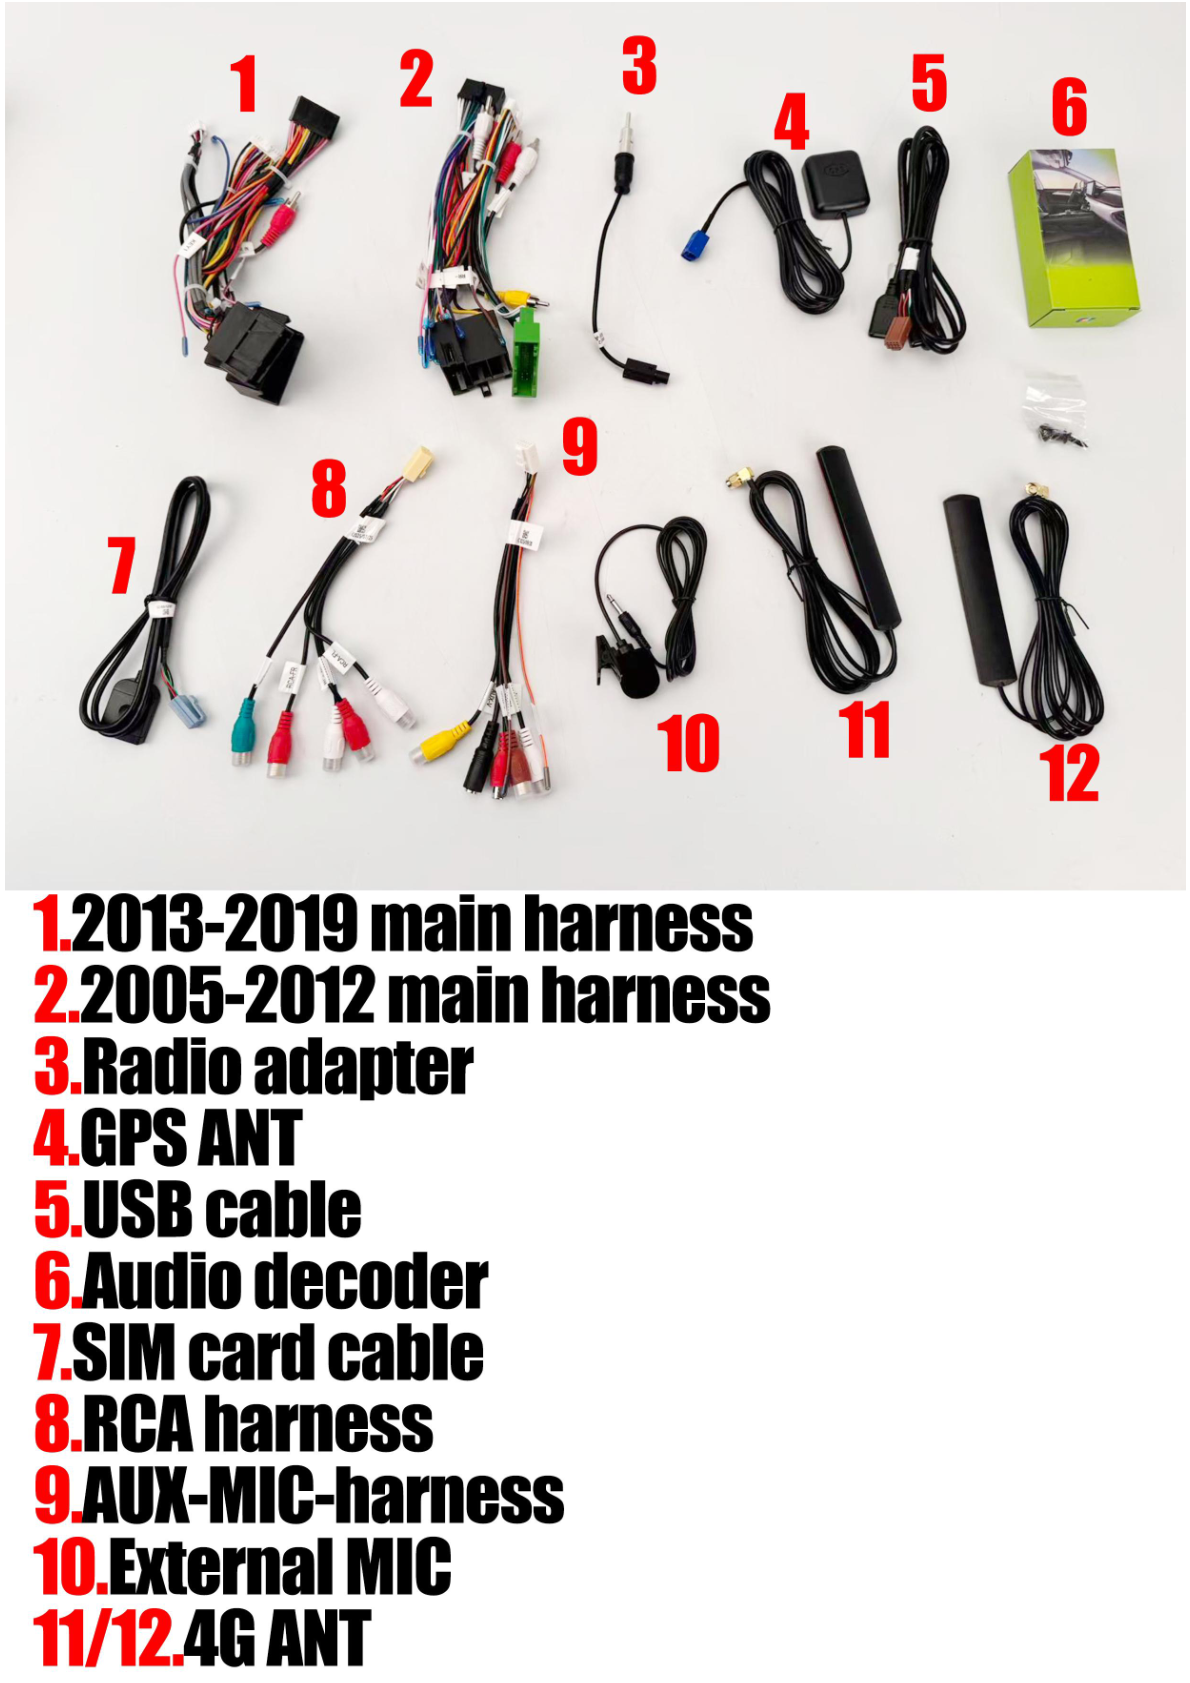
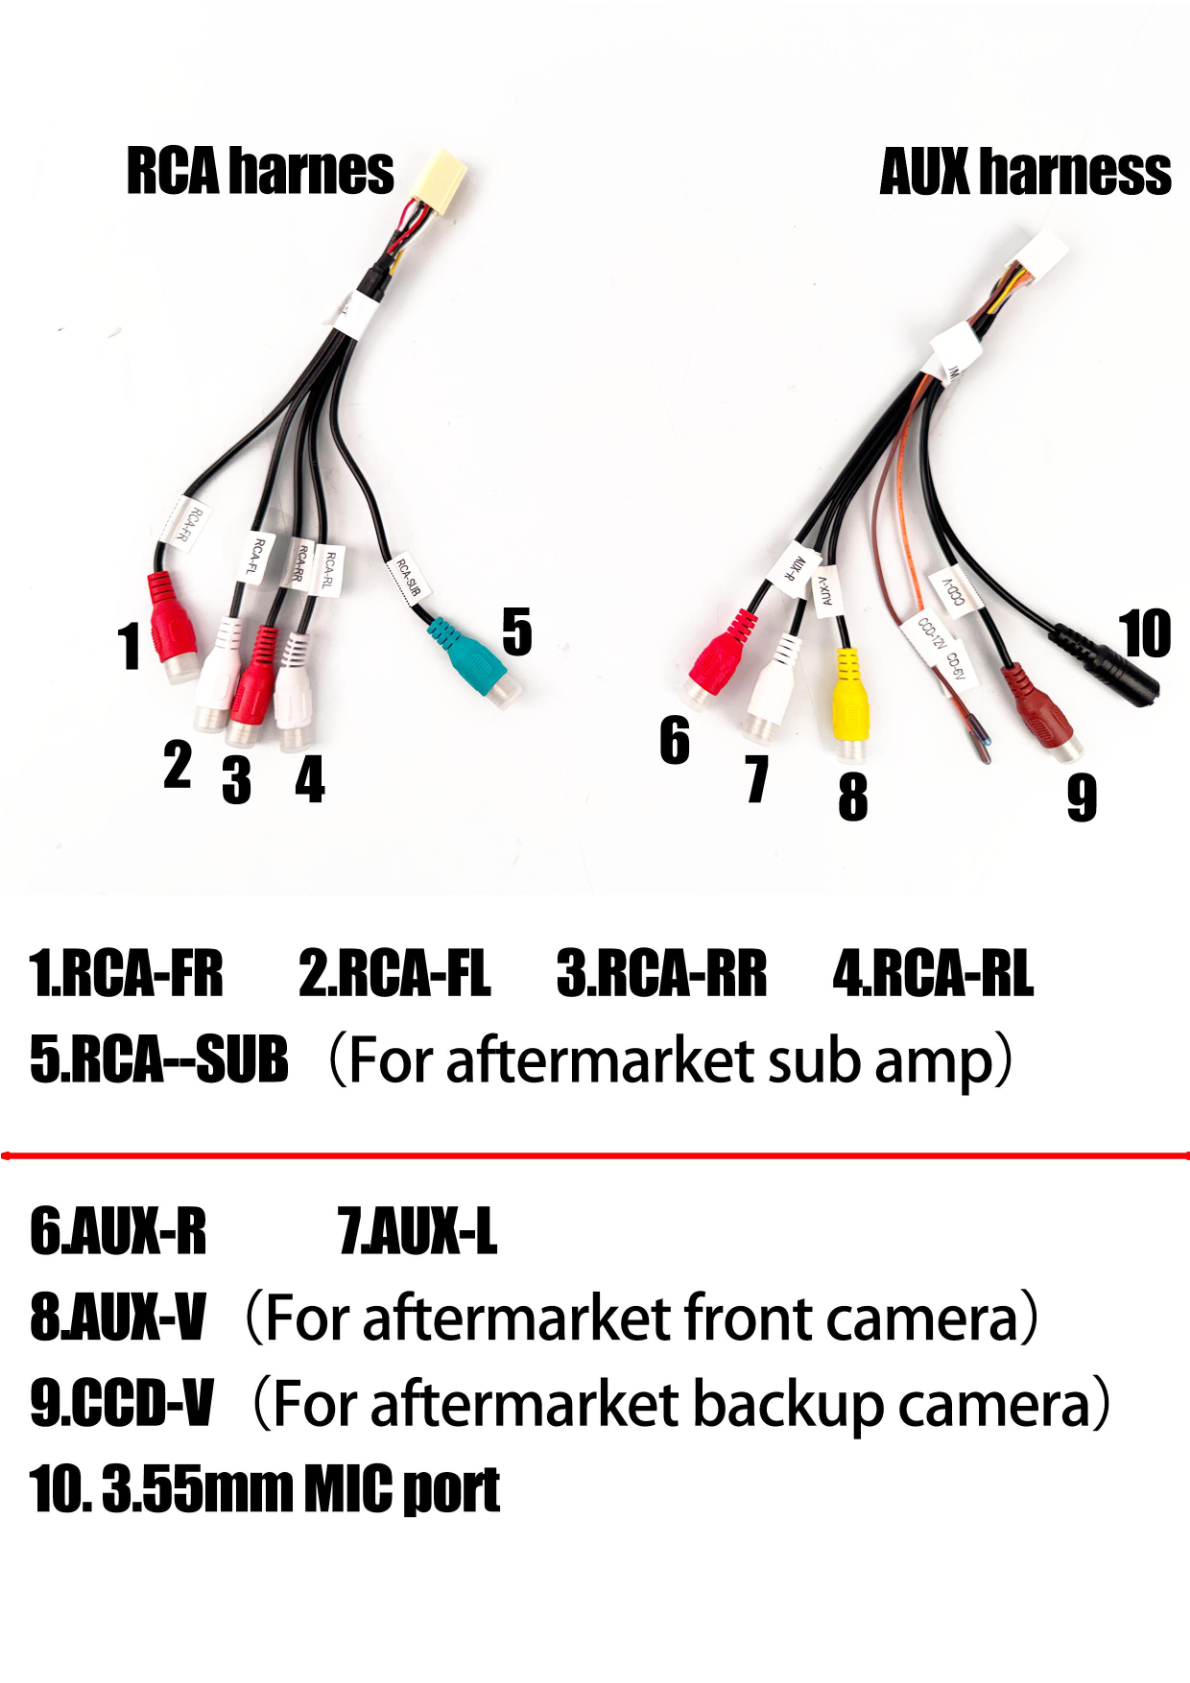
Table of connector mappings for various harnesses and ports.
Wiring connections for an external microphone and decoder box with labeled cables.
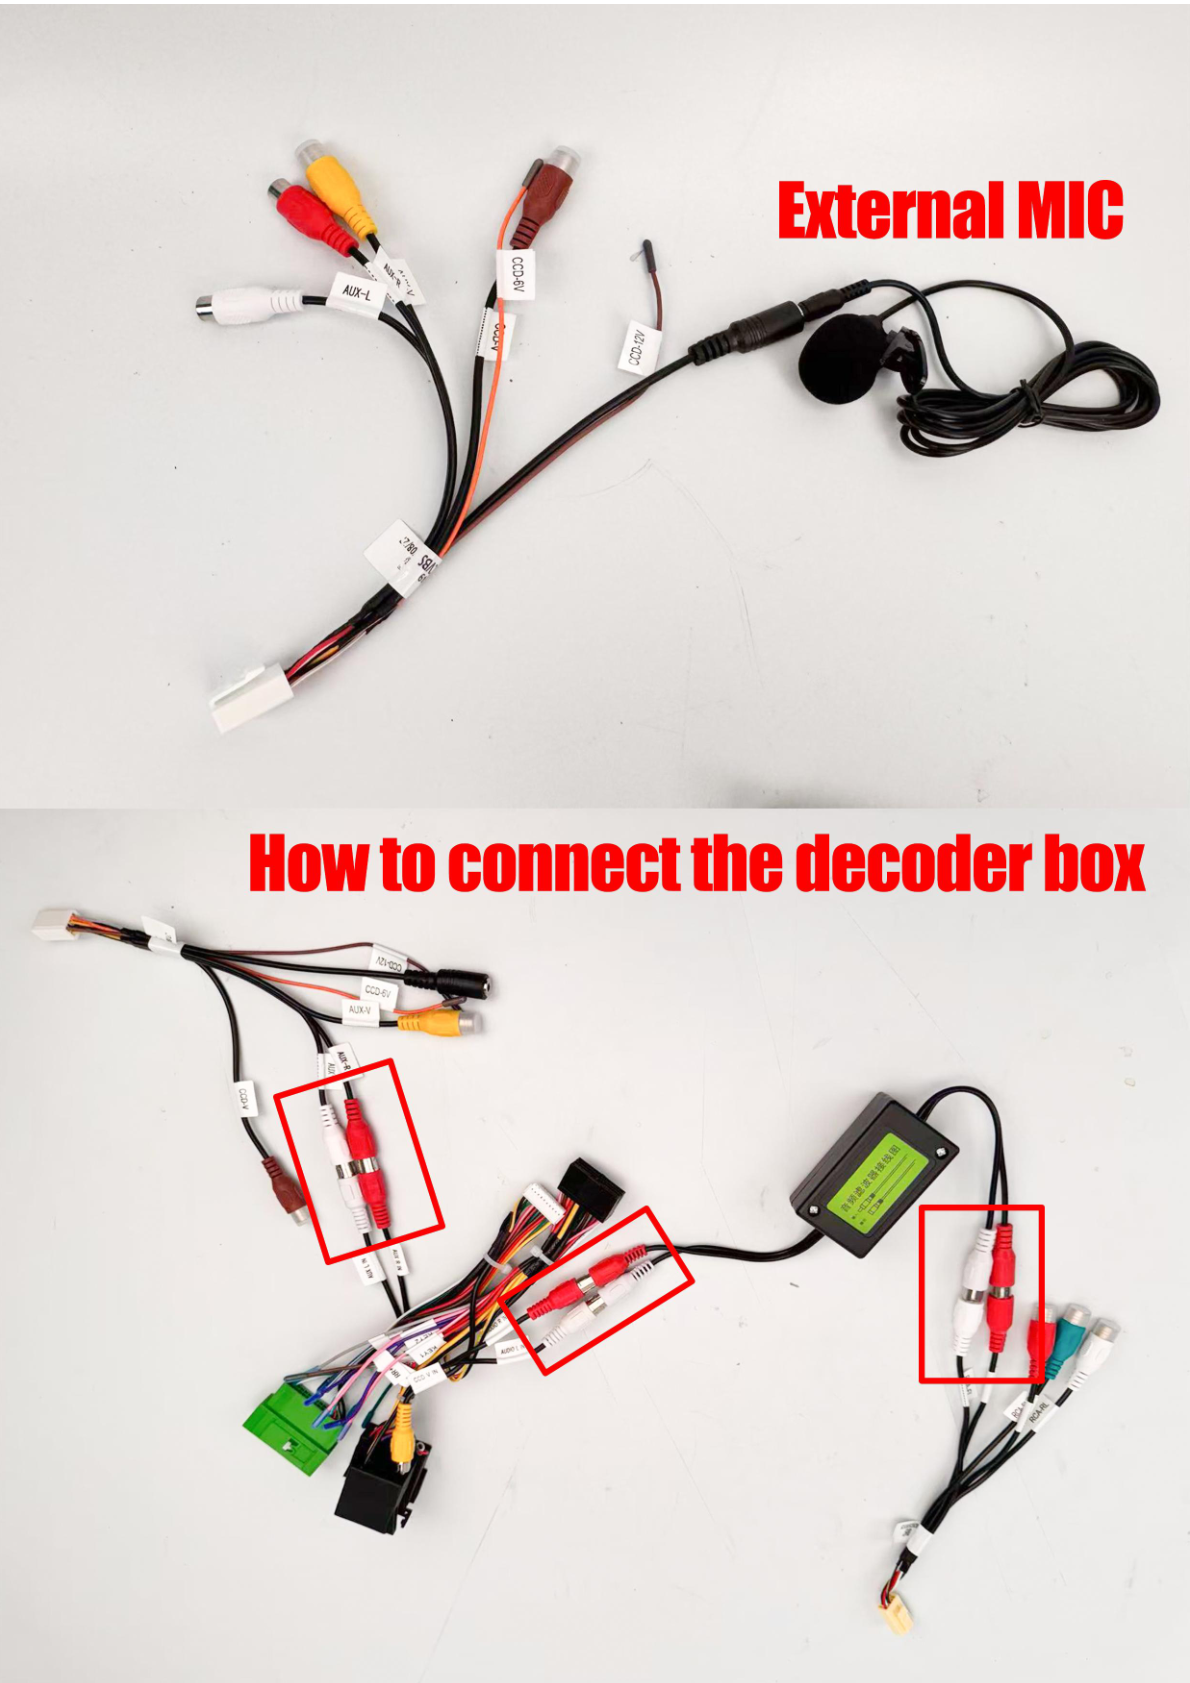
Photo of the OEM radio with labeled connectors for reverse camera, radio antenna, and power cable.
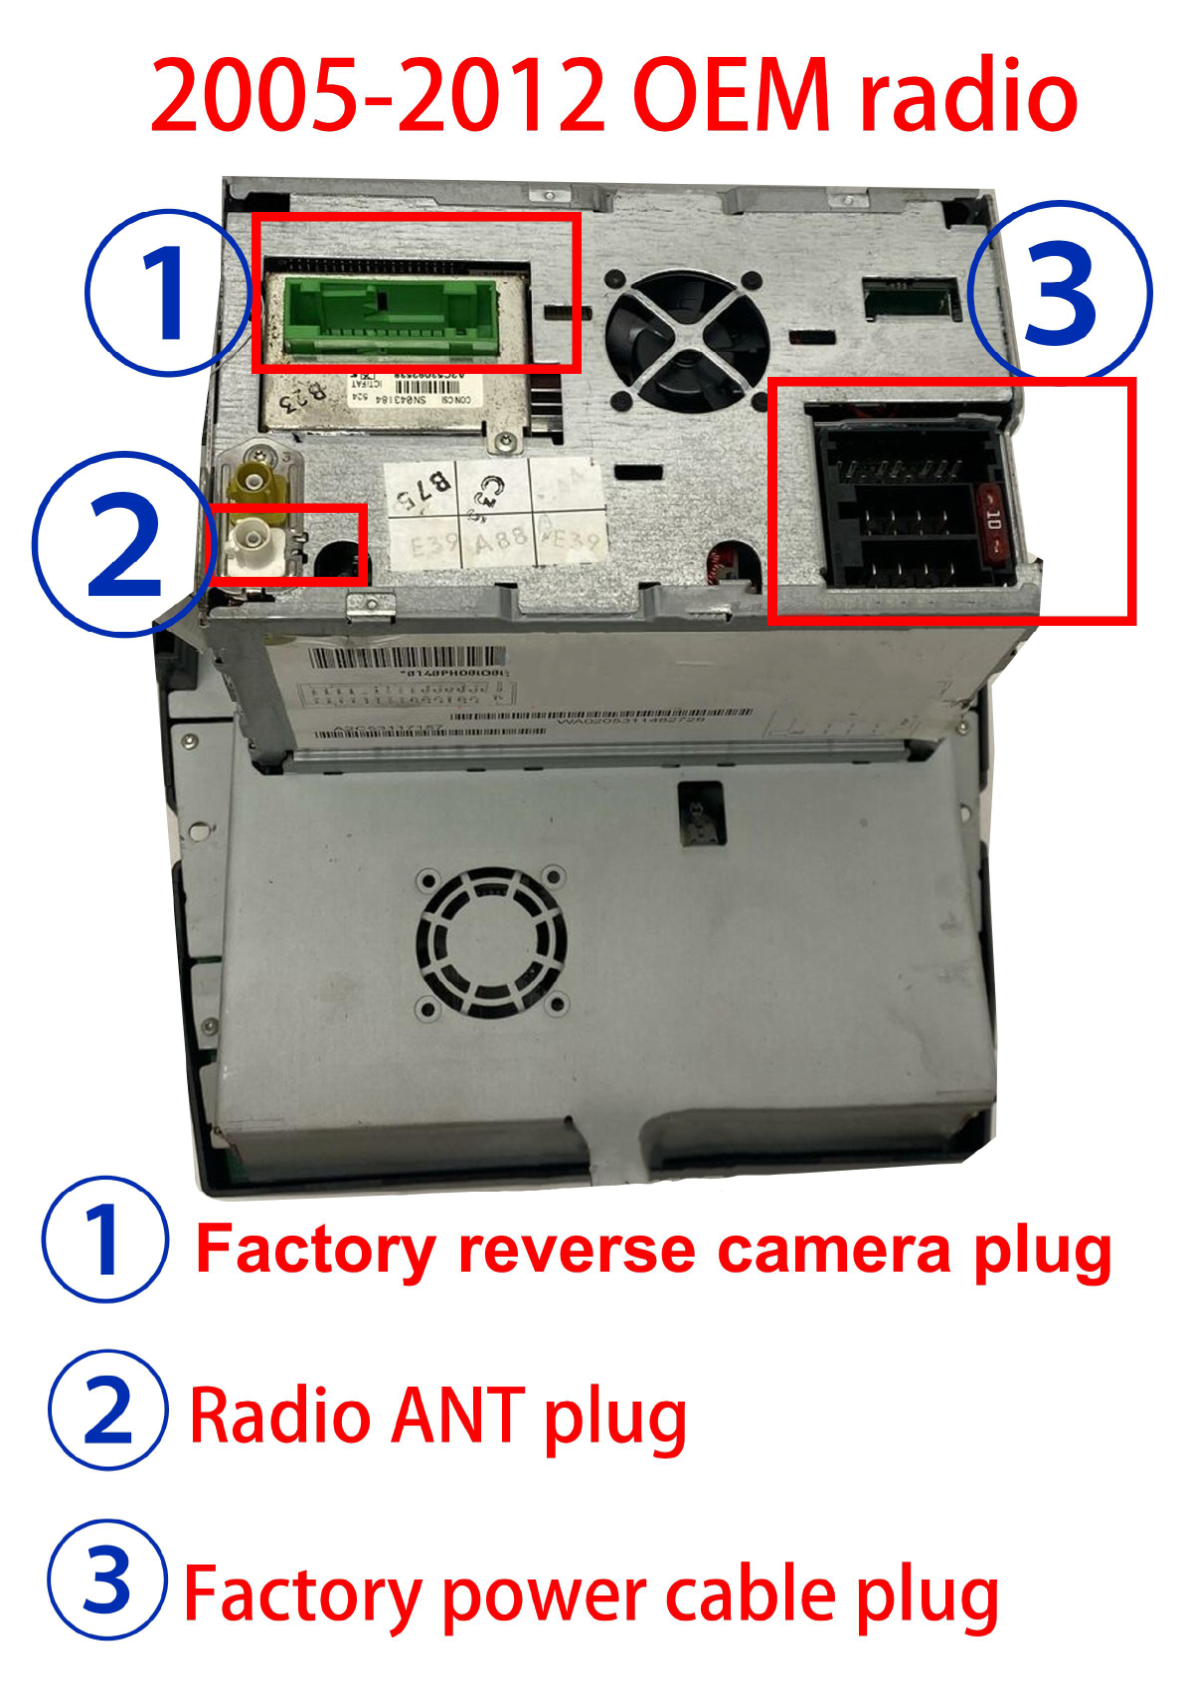
Photo of the OEM radio with labeled connectors and plugs.
Share:
How to Install a Head Unit in Your Audi R8 (2007-2015): Complete Guide
How to Install a Head Unit in Your Cadillac ATS, XTS, SRX, or CTS (2013-2018): Complete Guide with Wiring Diagrams