

Introduction
Upgrading your Chevrolet Colorado (2014-2018) with a new head unit can transform your driving experience. In this guide, we will walk you through the installation process of the SquareWheels G-Series Android head unit, providing you with detailed steps and wiring diagrams to ensure a smooth installation.

Tools Required
- Trim removal tool
- Screwdriver (for removing screws)
Pre-Installation Notes
Before starting the installation, ensure that your vehicle is turned off and prepare a clean and organized workspace.
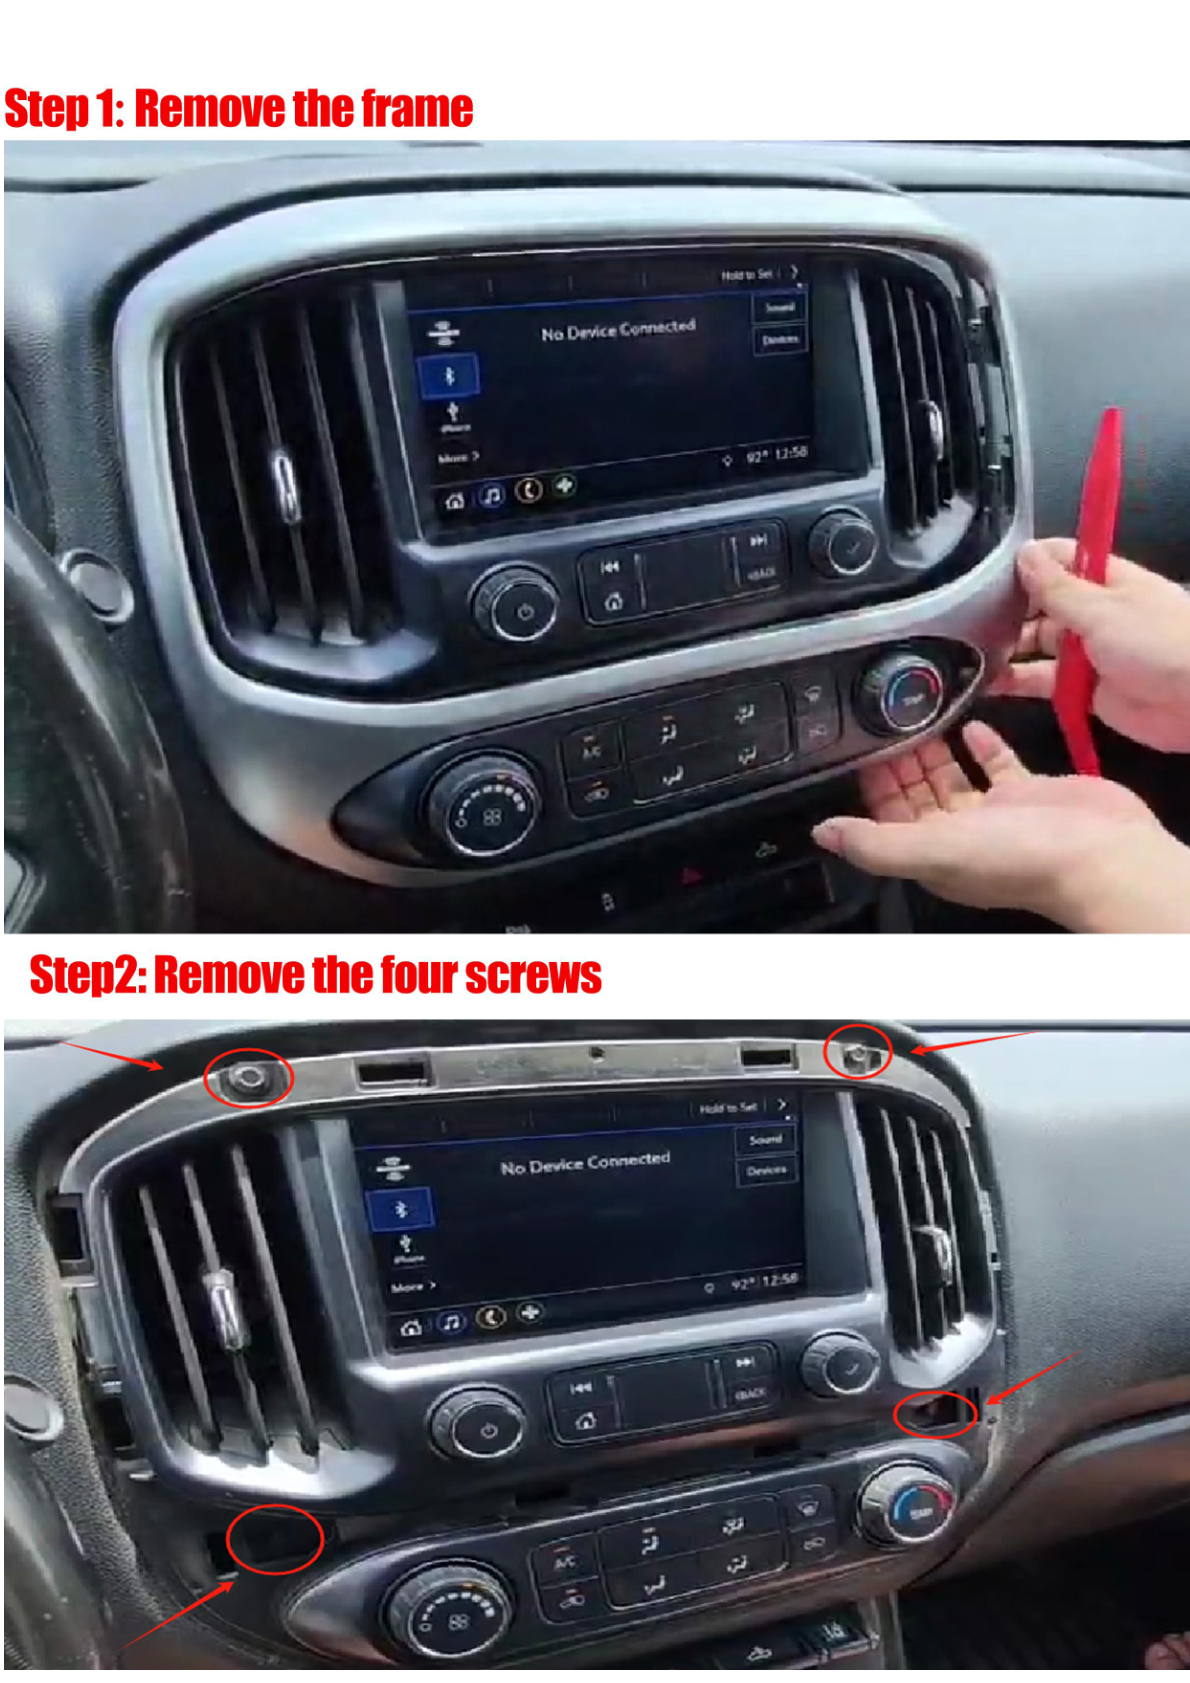
Step 1: Remove the Factory Head Unit
Follow these steps to safely remove the existing head unit:
- Remove the Frame: Use a trim removal tool to carefully pry around the edges and detach the frame.
- Remove the Screws: Identify and remove the four screws holding the unit in place.
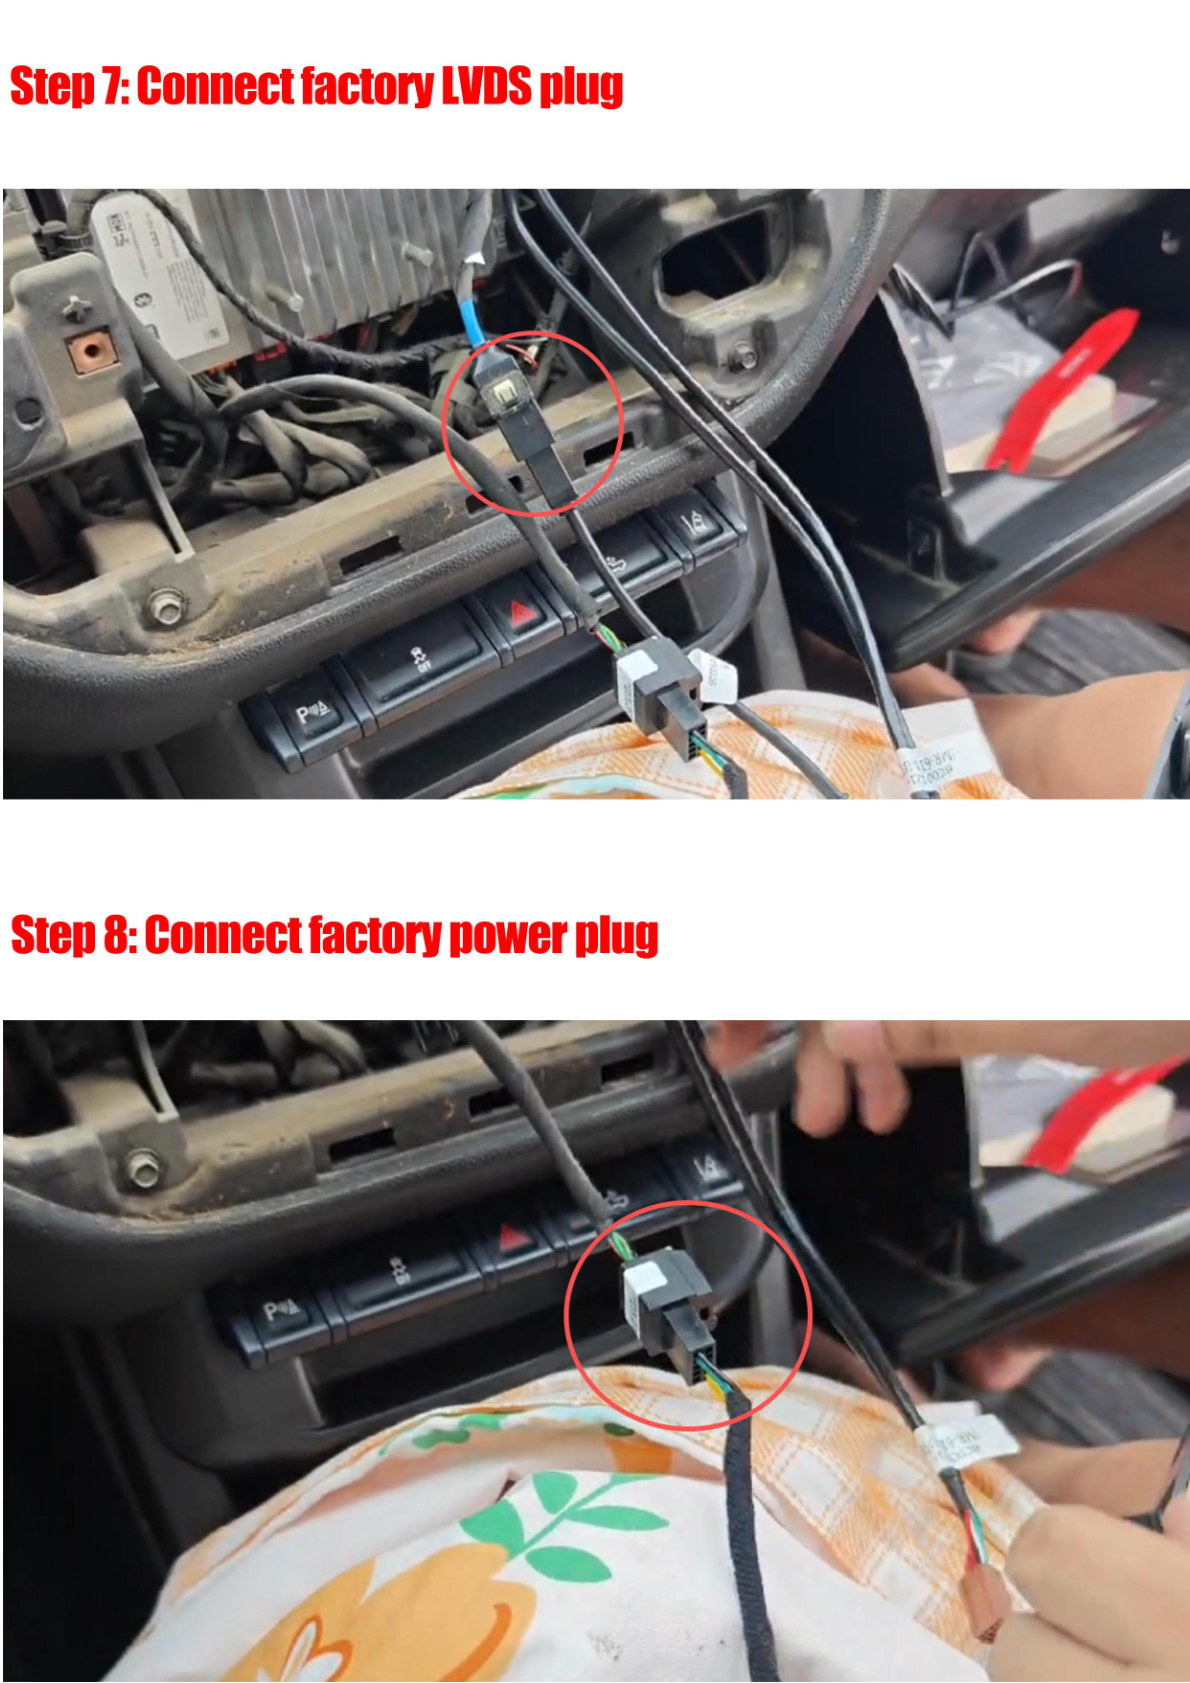
- Disconnect the Plugs: Unplug the factory LVDS plug and screen plug (the screen plug does not need to be reconnected). Unplug the power cord carefully.
- Remove Vents: Detach the vents from the factory unit.
Step 2: Install the New Head Unit
Now that the factory unit is removed, it’s time to install the new G-Series head unit:
- Transfer Vents: Install the previously removed vents onto the new head unit.
- Connect the Plugs: Connect the LVDS plug to the new unit and connect the factory power plug.
Wiring/Connections
During installation, you will need to connect various components:
- LVDS Adapter (Plug)
- Power Adapter (Plug)
- USB Cable
- Steering Wheel Control Adapter
- Speaker Adapter
- 4G ANT (x2)
- SIM Card Cable
- AUX Harness
- Speaker
- External MIC
- AUX Cable

Step 3: Test the Head Unit
Before reassembling everything, it's crucial to test the head unit functionalities, including display, audio, and connectivity.
Step 4: Reassemble the Dashboard
Once testing is successful, securely reattach the frame around the new head unit.
Tips & Warnings
- Handle all components and connectors with care to avoid damage.
- Ensure all connections are secure and free of obstruction before finalizing the installation.
- Do not force any parts during removal or installation to prevent breakage.
Conclusion
Installing a new head unit in your Chevrolet Colorado can greatly enhance your driving experience. With the right tools and careful attention to detail, you can complete this upgrade yourself. If you're looking for the G-Series head unit, check it out here.
Share:
How to Install a Head Unit in Your Cadillac Escalade (2007-2014): Complete Guide with Wiring Diagrams
How to Install a Head Unit in Your Chevrolet Silverado (2015-2019): Complete Guide with Wiring Diagrams