

How to Install a Head Unit in Your Audi R8 (2007-2015)
Upgrading your Audi R8's head unit can significantly enhance your driving experience. In this guide, we’ll walk you through the installation process of the G-Series head unit, specifically designed for Audi R8 models from 2007 to 2015.
Tools Required
While specific tools are not listed, you may typically need:
- Screwdrivers
- Panel removal tools
- Socket set
Pre-Installation Notes
Before you begin, ensure that your vehicle is turned off and the keys are removed from the ignition to avoid any electrical issues.
Removal Steps
Although detailed removal steps are not specified, the general process involves:
- Carefully removing trim pieces around the factory unit.
- Unscrewing and gently pulling out the existing head unit.
Installation Steps
- Identify and Prepare Connectors: Layout all necessary cables and components, comparing connectors with the head unit's sockets for orientation.
- Attach Antennas: Connect the 4G ANT and GPS ANT to their respective sockets.
- Connect Main Harness: Attach the main harness to the power plug socket.
- RCA and Other Connections: Plug the RCA harness into the RCA harness socket and connect USB cables to the USB cable sockets.
- CANBUS Connection: Attach the CANBUS unit as necessary.
- Secure and Replace Trim: Place the unit back into the dash and secure it with screws, reattaching any trim pieces removed earlier.
Wiring/Connections
Ensure the following connections are made:
- WiFi ANT, GPS ANT, and 4G ANT to their specified antenna sockets.
- Main harness from the vehicle to the power plug socket.
- USB connections to the USB cable socket.
- RCA connections through the RCA harness for audio/video inputs/outputs.
- CANBUS for vehicle data integration.
Post-Installation
Once installed, test all functions including audio, GPS, and connectivity features. Ensure that steering wheel controls, if applicable, work correctly. Finally, secure all panels and trim, checking for any loose wiring or unplugged connectors.
Tips & Warnings
- Safety Warning: Disconnect the battery before starting the installation to prevent electrical shorts.
- Common Issues: Double-check all connections if a component does not function and ensure wires are routed neatly to avoid pinching when reassembling panels.
- Note: If you are unfamiliar with car electronics, consider professional installation to avoid damage.
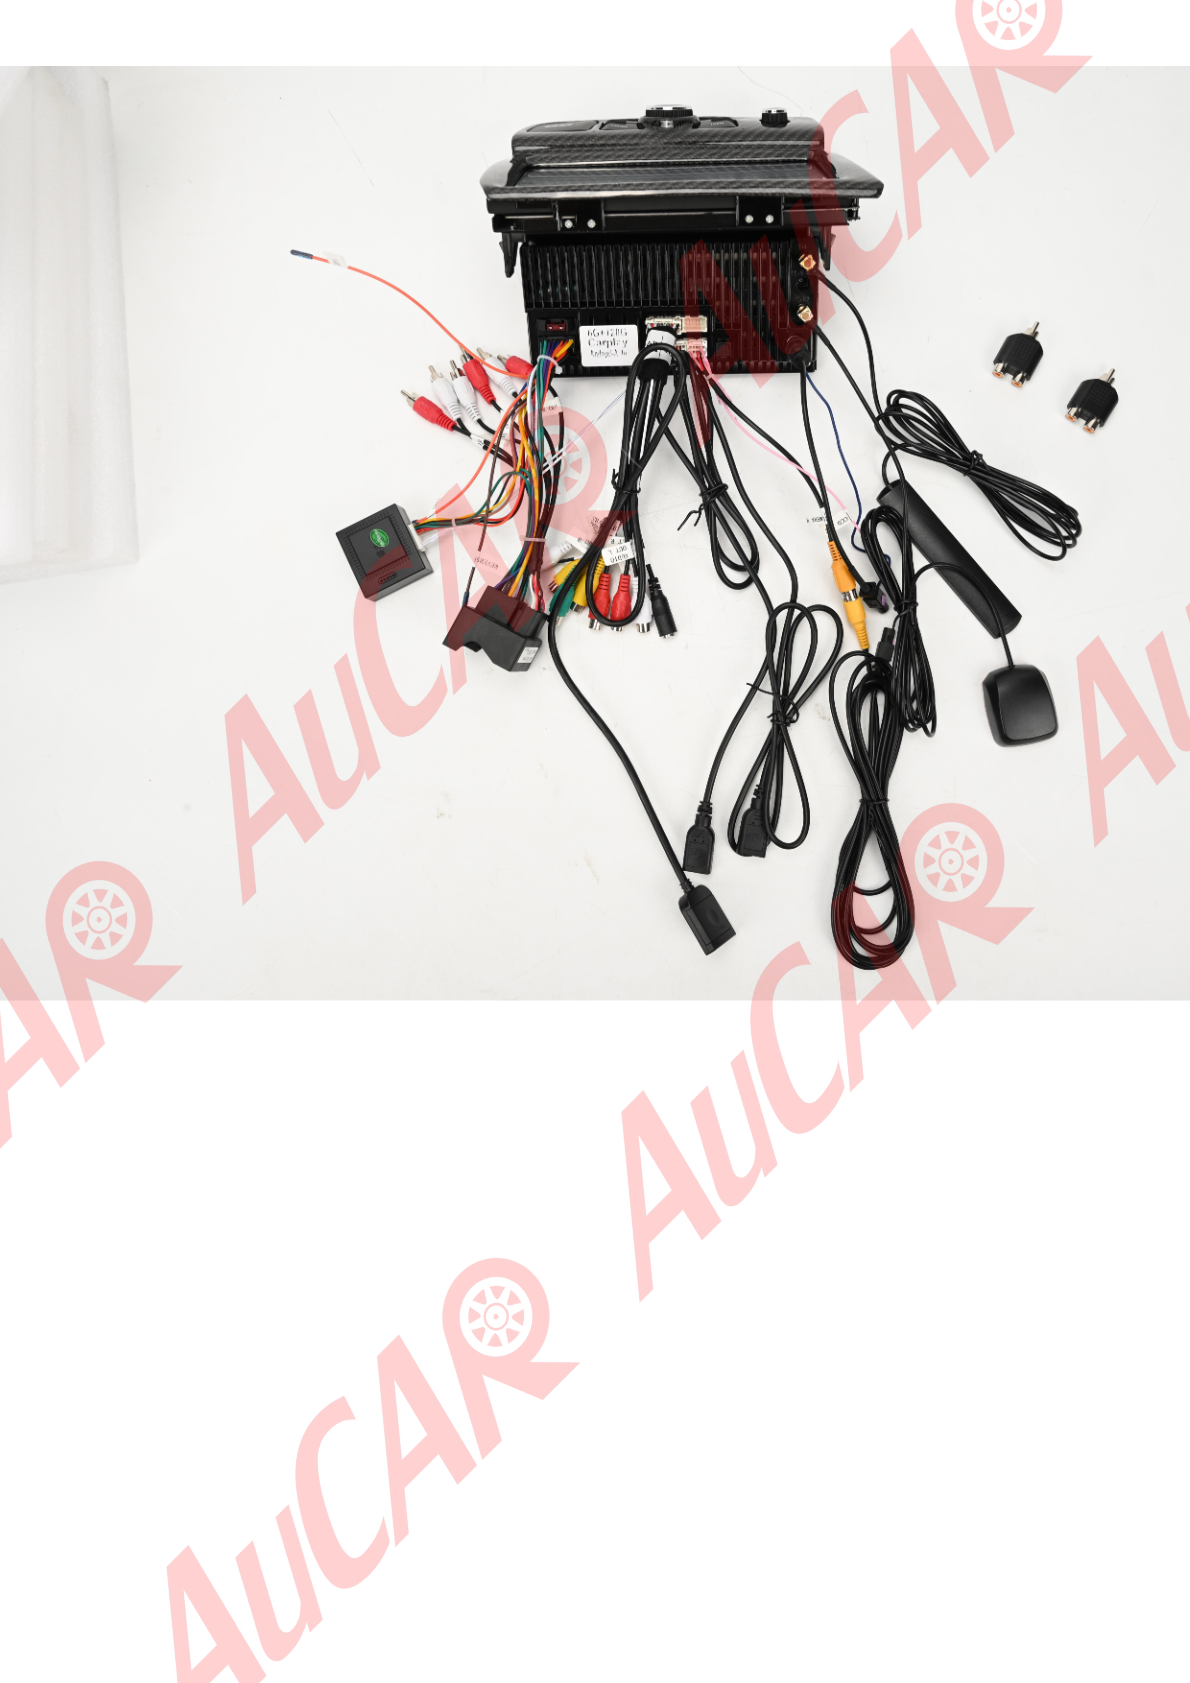
Installation Diagrams
Photo showing the back of an aftermarket head unit with labeled sockets and connections.
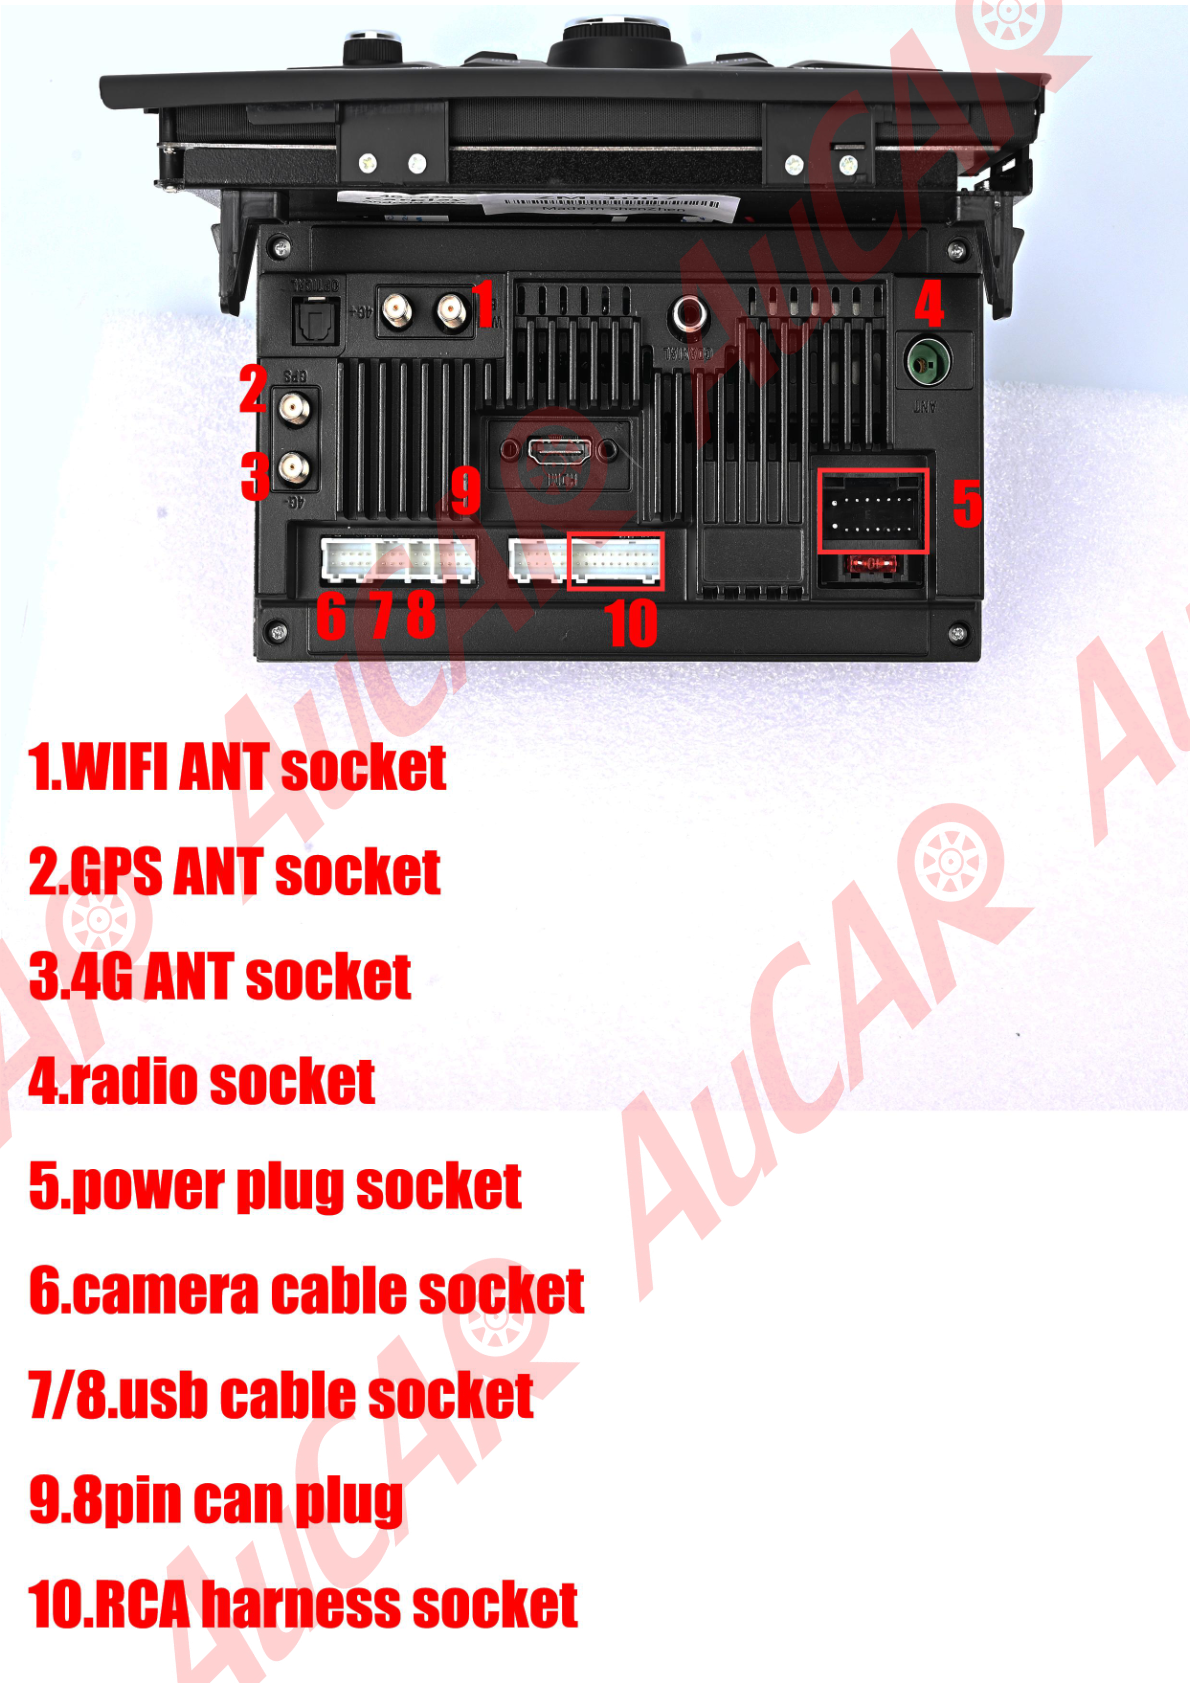
Photo showing various components and accessories related to the Audi R8 aftermarket head unit installation.
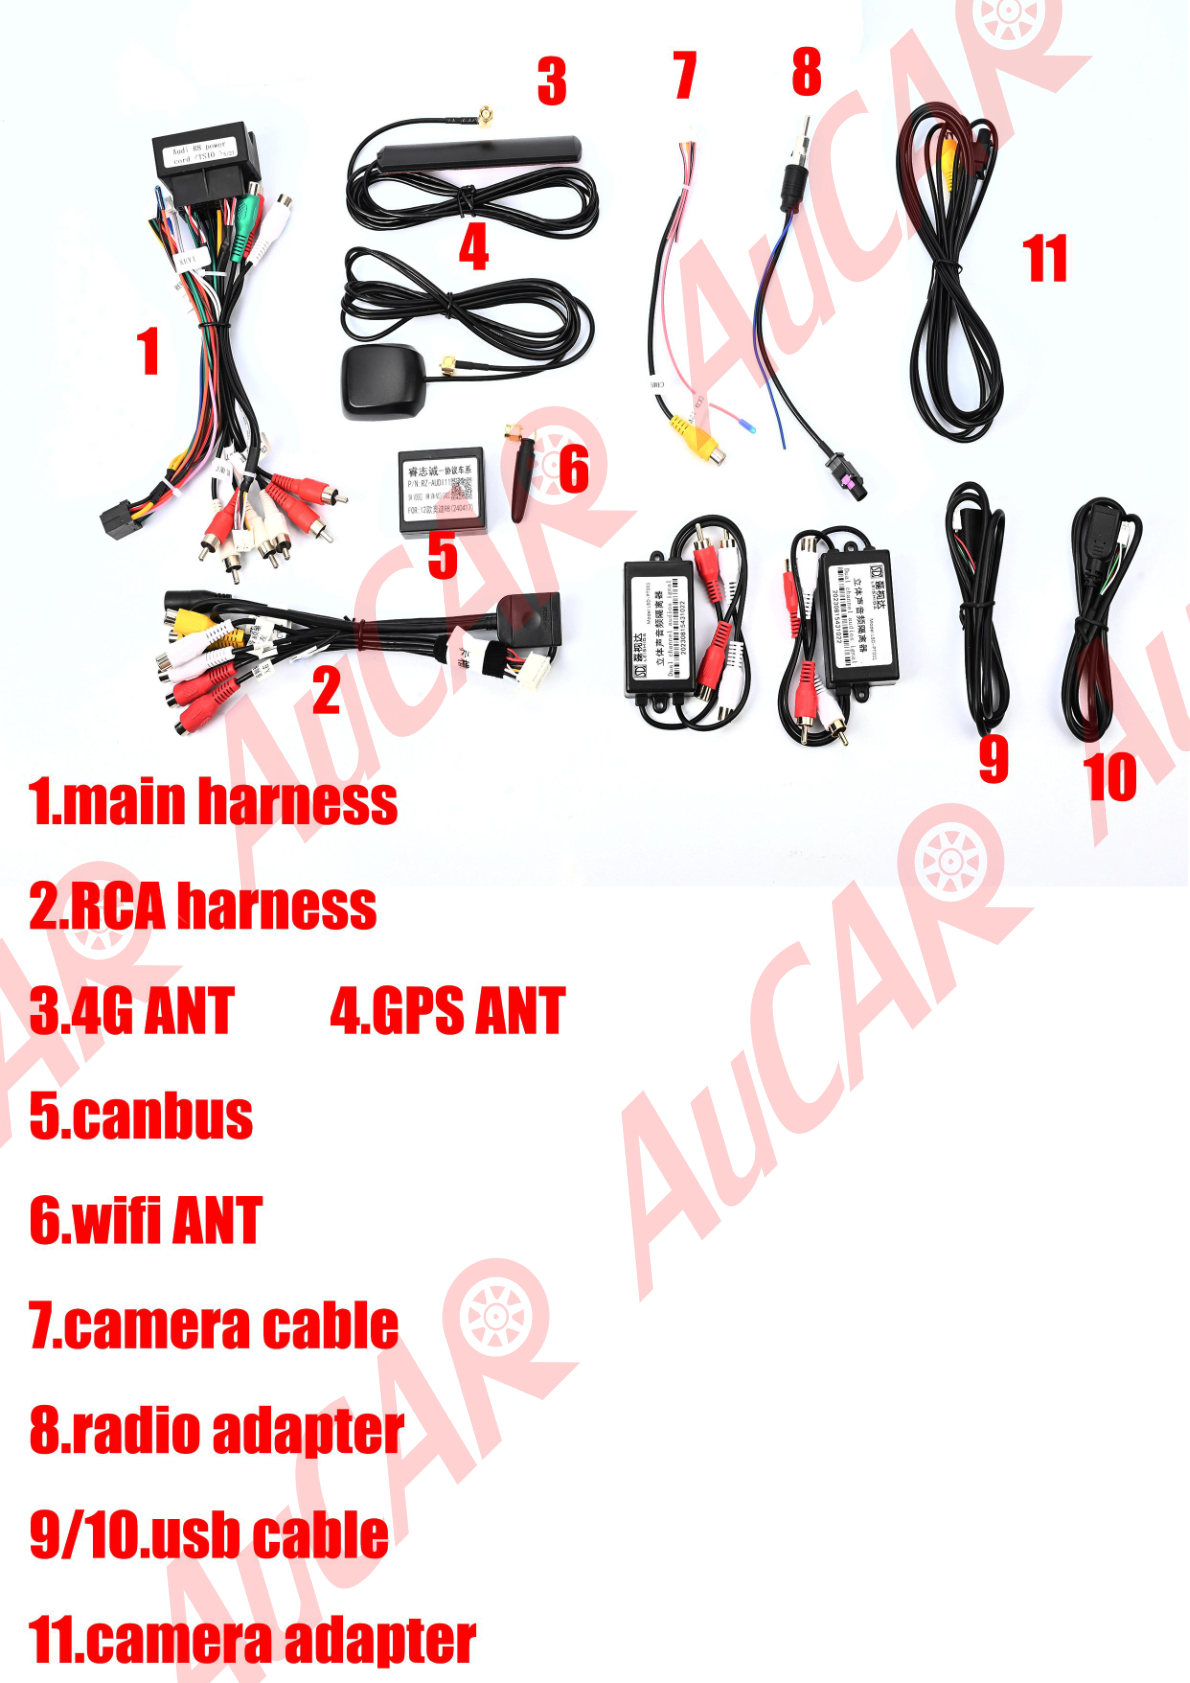
Photo showing the aftermarket head unit and its wiring connections.
Share:
The Complete Guide to the G-Series MK7: Everything You Need to Know
How to Install a G-Series Head Unit in Your Bentley Continental GT Flying Spur (2003-2019)