
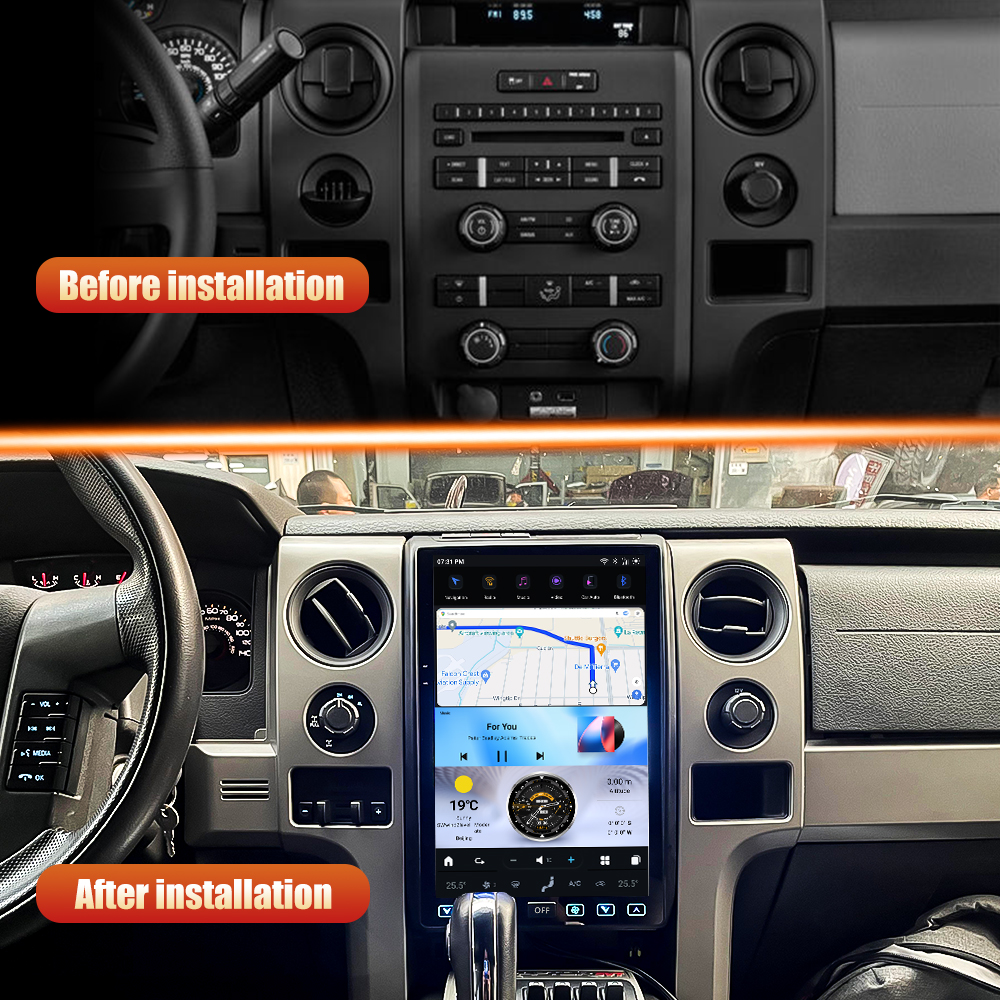
Introduction
Upgrading the head unit in your Ford F150, F250, F350, F450, or F650 (2020-2025) can enhance your driving experience with modern features and connectivity. This guide will walk you through the installation process for the SquareWheels G-Series head unit, ensuring you have everything you need for a successful upgrade.

Tools Required
- Screwdriver set (Phillips and flathead)
- Plastic trim removal tools
Pre-Installation Notes
Before starting the installation, ensure the vehicle is turned off and keys are removed from the ignition for safety.

Removal Steps
- Remove the Frame: Use a trim tool to gently pry and remove the frame around the head unit.
- Remove Decorative Strips: Carefully detach the decorative strips beneath the frame.
- Remove the Four Screws: Unscrew the four screws securing the unit to the dashboard.
- Take Off the AC Panel: Gently pull and remove the AC panel to gain access to the head unit.
Installation Steps
- Securely install the new head unit in the dashboard opening and replace the four screws.
- Reattach the AC panel, decorative strips, and frame.
Wiring/Connections
Follow these steps for proper wiring and connections:

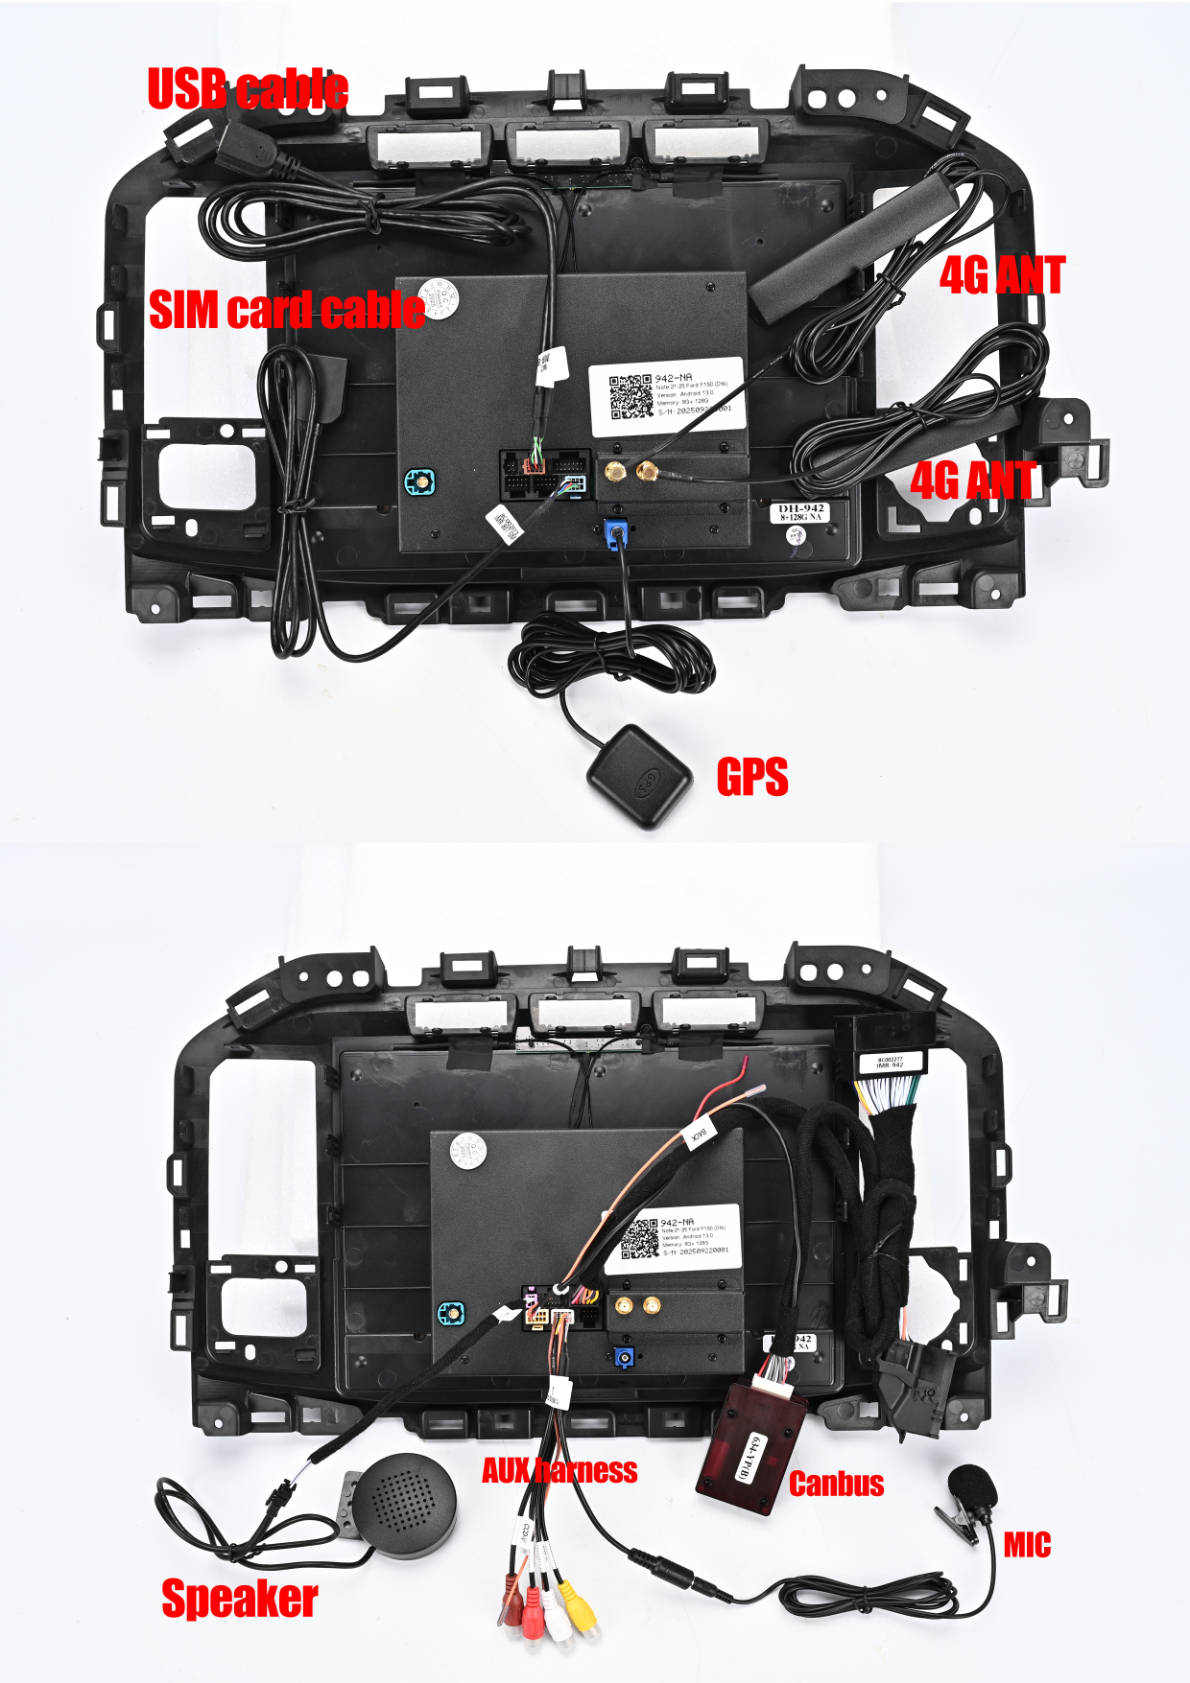
- Main Harness: Connect the Power Plug to the head unit. Connect the male plug to the Sync Module and the female plug to the Sync Module male plug. Ensure the CANBUS connection is in place.
- Cables and Antennas: Connect the USB cable, SIM card cable, GPS antenna, and 4G antennas as shown in the wiring diagram.
- Other Connections: Connect the AUX-MIC-Camera harness, speaker adapter, and external microphone.
- Factory LVDS Cable: Connect the factory LVDS cable to the designated port.
Post-Installation
Testing
Ensure all connections are secure and test the head unit for proper functionality, including audio and connectivity features.
Reassembly
Reattach any panels or trim pieces removed during the process.
Tips & Warnings
- Follow all provided instructions closely to avoid damaging components.
- Keep track of all screws and small components during removal and installation.
- Double-check all electrical connections to ensure secure attachment.
- If you encounter unexpected issues, consult with a professional installer.
Conclusion
Upgrading your head unit can significantly enhance your driving experience. By following this guide, you can install the G-Series head unit in your Ford F150, F250, F350, F450, or F650 with ease. For more information on our products, visit our product page.

Share:
How to Install a Head Unit in Your Ford Explorer (2011-2019): Complete Guide with Wiring Diagrams
How to Install a Head Unit in Your Ford F250 F350 F450 F650 (2010-2016): Complete Guide with Wiring Diagrams